The final goal of this tutorial is to perform body tracking with your own 3D model using your cell phone or tablet via the app Artist 3D Viewer.
In order to get this, the main topic is how to enable our 3D model to body tracking according the skeleton hierarchy required by Apple's ARBodyTracking framework.
In this tutorial we will use the following applications:
- Blender 2.8x
- Artist 3D Viewer
- (* Additionally, we will use Tlakali's Blender plugin for vertex normalization.)
We can summarize the procedure in the next steps:
- Download the reference model file that already has the skeleton with the required hierarchy. (Download here)
- Open your own 3D model in Blender (or export it if is not Blender native).
- Append the standard skeleton to your scene from the reference file. (In Blender is different append or import)
- Adjust your 3D model according the skeleton size and the bones according your model shape.
- Assign the skeleton to your model with automatic weights.
- Append the joints based skeleton to your scene from the reference file.
- Adjust the joints based skeleton according your model shape.
- Assign the joints based skeleton to your model preserving the vertex groups.
- Apply the vertex normalization plugin.
- Export your 3D model in fbx format.
- Open your 3D model using Artist 3D Viewer and have some fun watching your model following your movements.
It may look that there are many steps, but those are really easy and fast steps. The most time consuming task is adjusting the bones, however, if your model is in the classic "T" pose this task will be much easier.
All the steps are detailed below:
1- Download the reference model file that already has the skeleton with the required hierarchy
This Blender file contains the following elements:
- Example humanoid mesh (Body)
- Standard skeleton with required hierarchy (Armature-Std)
- Joints based skeleton with the required hierarchy (Armature-Mod)
<Download Blender file here (Tlakali_BodyTracking_Ref_01.zip)>
2- Open your own 3D model in Blender
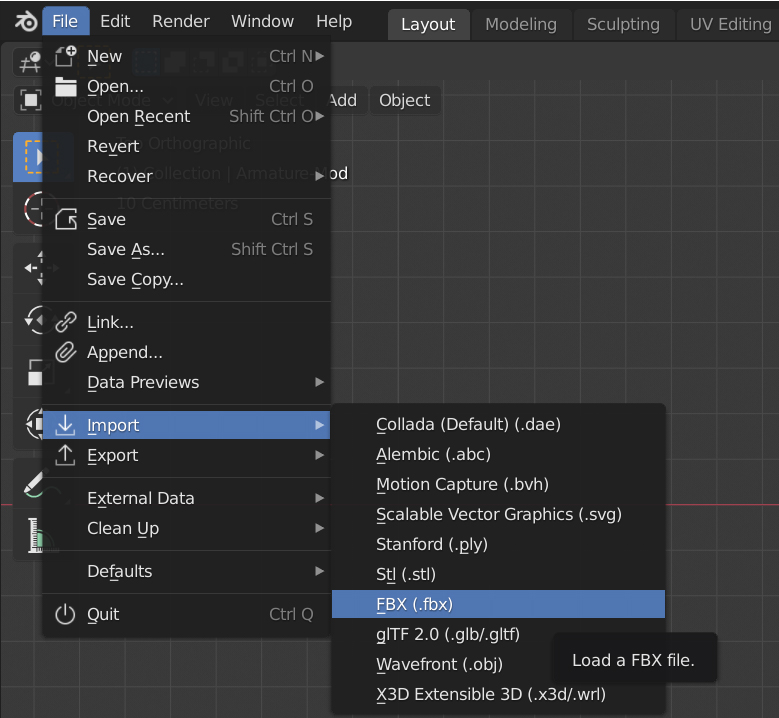
If your 3D model is not Blender native, an .fbx for example, you can import your model with no problem in the menu File -> Import -> FBX.
Now you have a scene with your 3D model. (In this tutorial I'm using a low poly model to show that any model is suitable for body tracking)
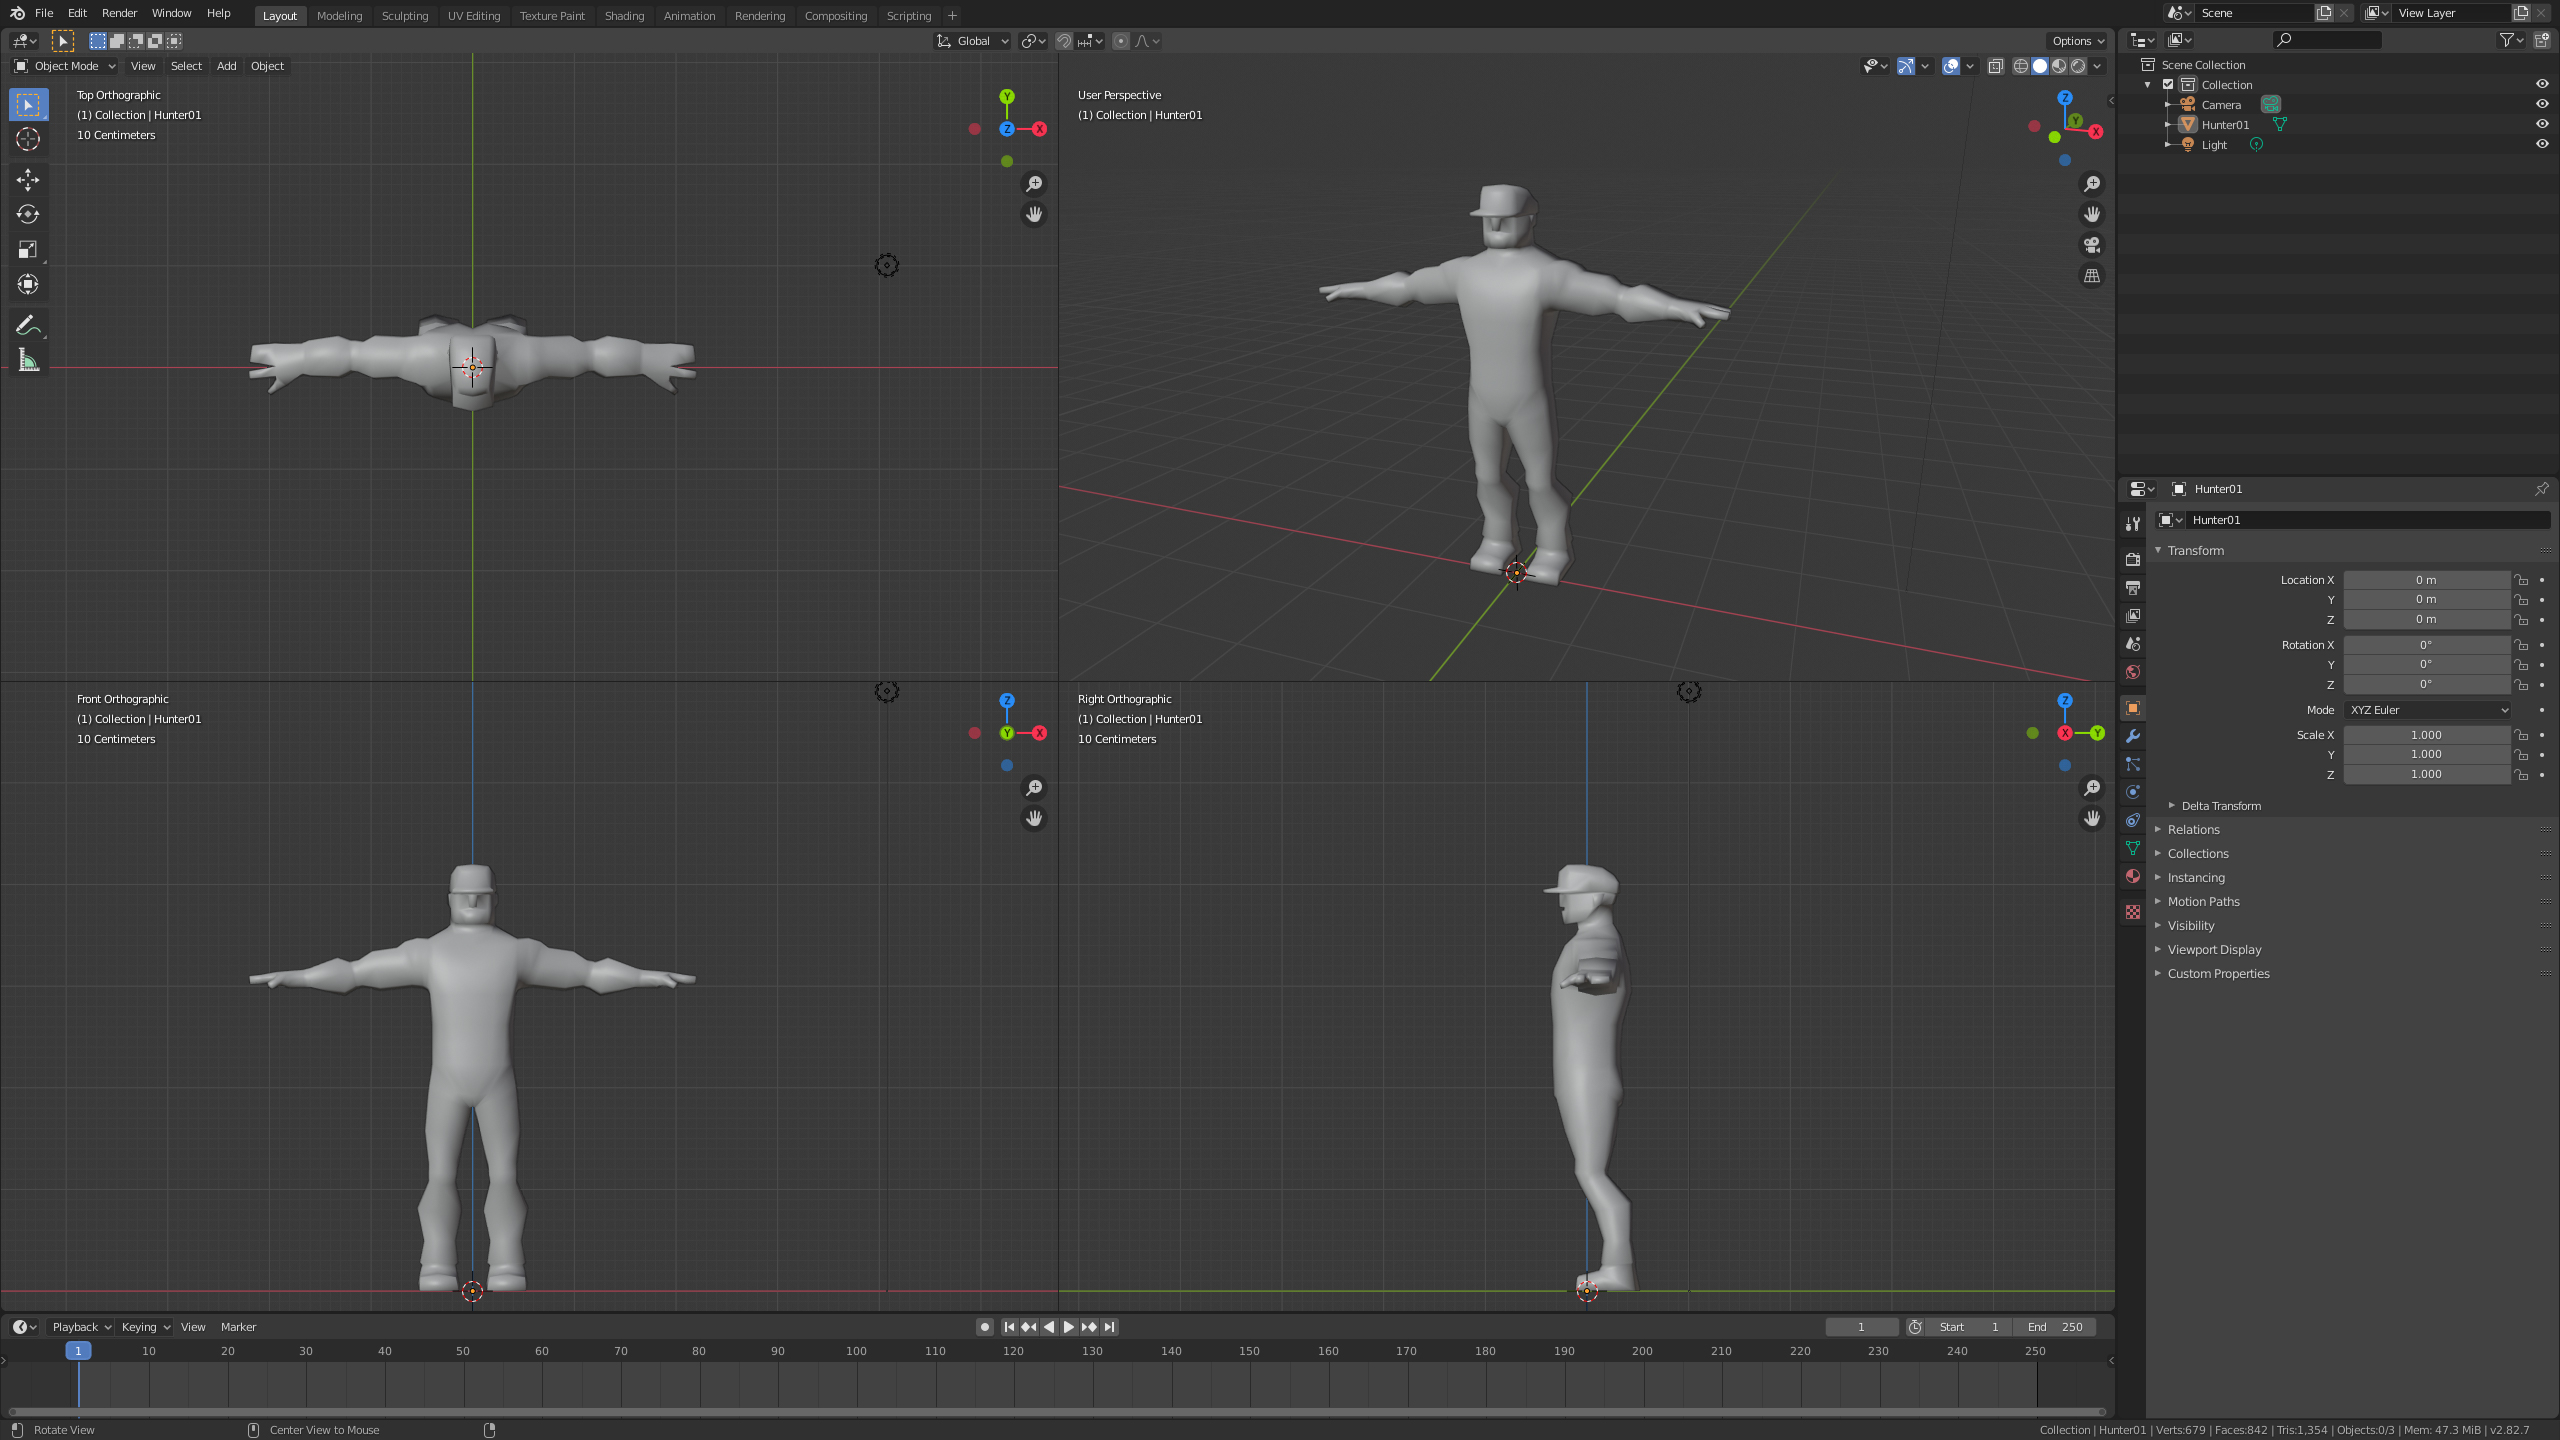
*To activate the quad view in Blender (as the image above) use the shortcut Ctrl+Alt+Q.
3- Append the standard skeleton to your scene from the reference file
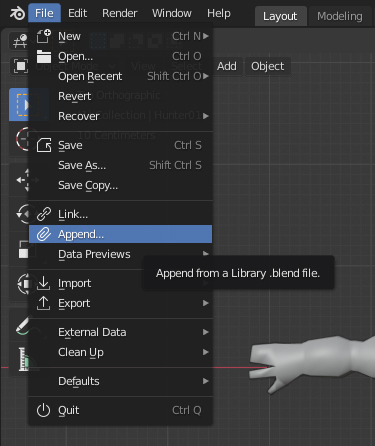
In Blender to append an element use the menu File -> Append.
In the append window select only "Objects" in the elements filter and navigate through the downloaded .blend file. When we append Blender elements the .blend file act as a folder where you should select /Object/Armature-Std.
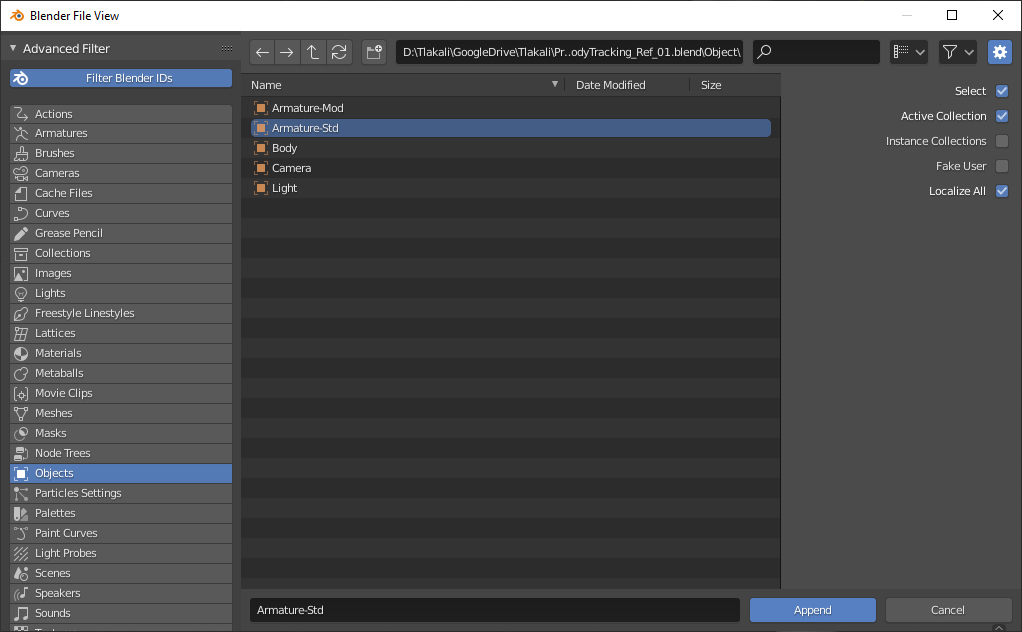
Now we can see the appended skeleton (armature in Blender) at the origin of the scene.
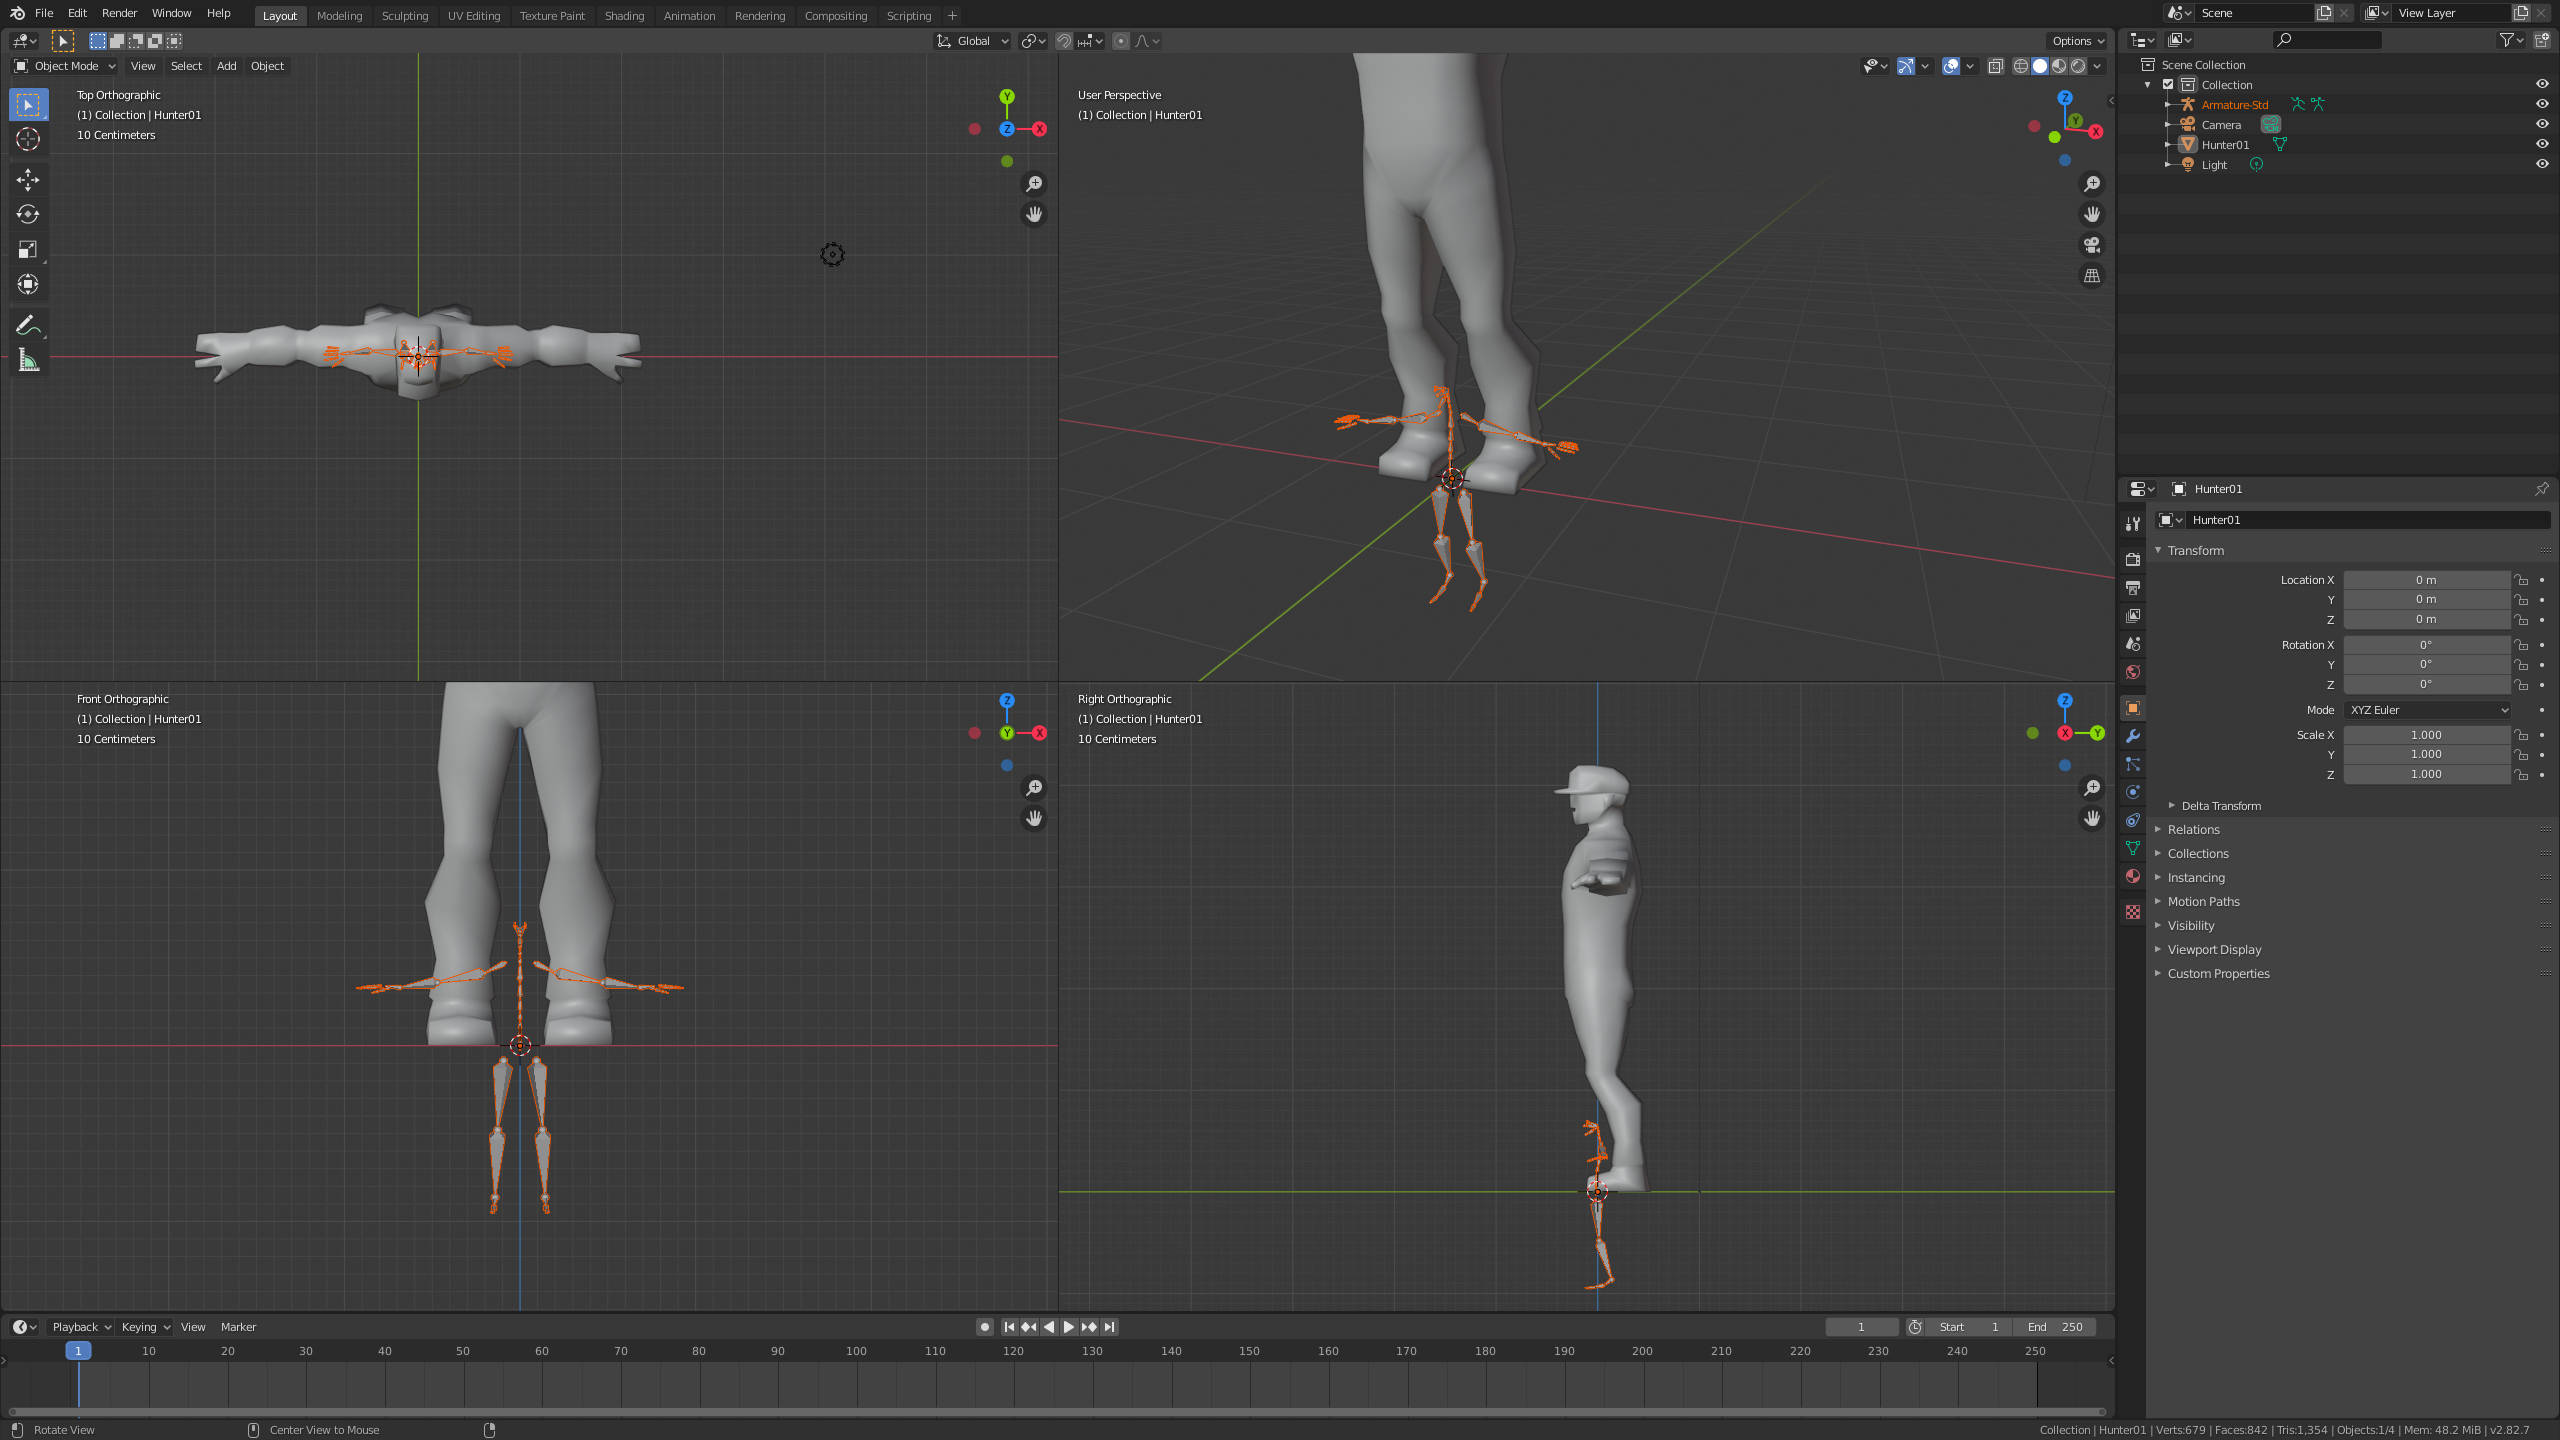
4- Adjust your 3D model according the skeleton size and the bones according your model shape
It's important to keep the scale and position of the appended skeleton, so we need to modify our model.
First modify the scale and position of the model trying to make it fit with the skeleton as much as possible.
As you can see, it will be easier if your model is in the standard "T" pose.
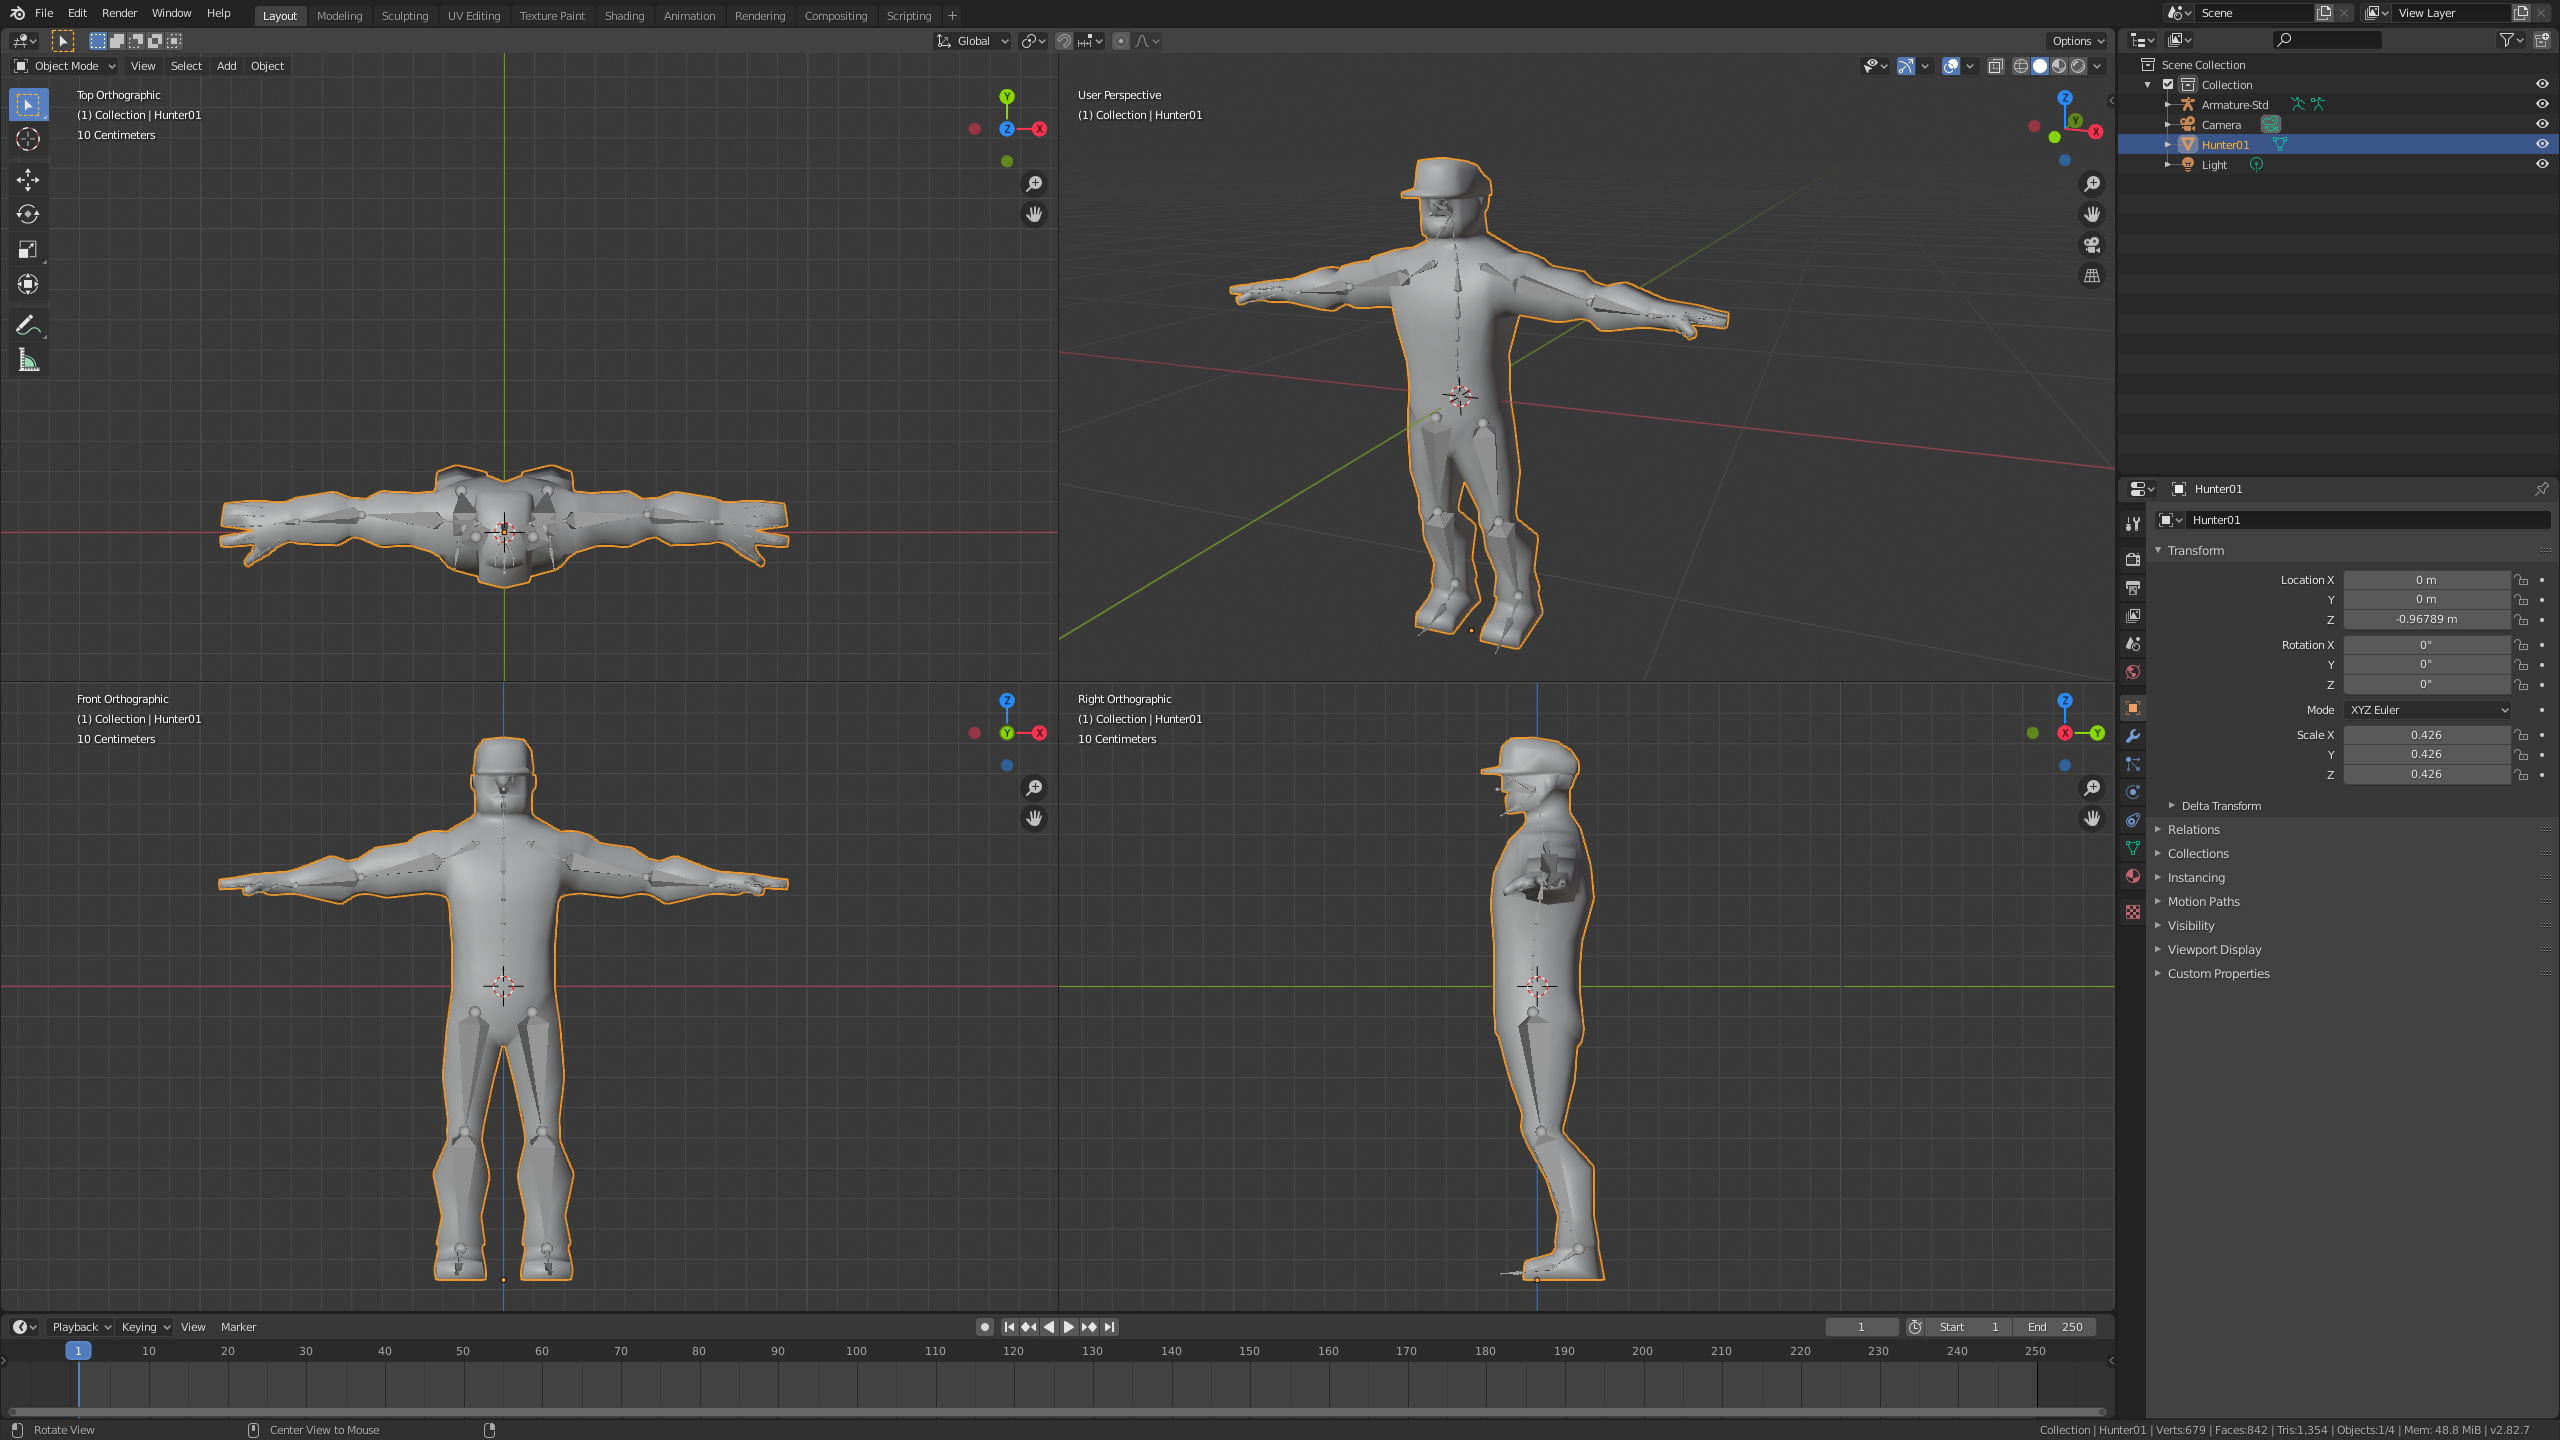
*Remember to perform those modifications in "Object Mode". Use the key "S" to scale and the key "G" to grab an object. ("G" then the axis key to block the movement only over the desired axis, for example "G" then "Z")
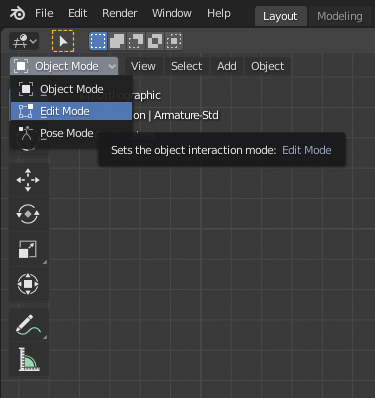
After adjust the model as much as possible, we need to adjust in detail the bones according the shape of the model.
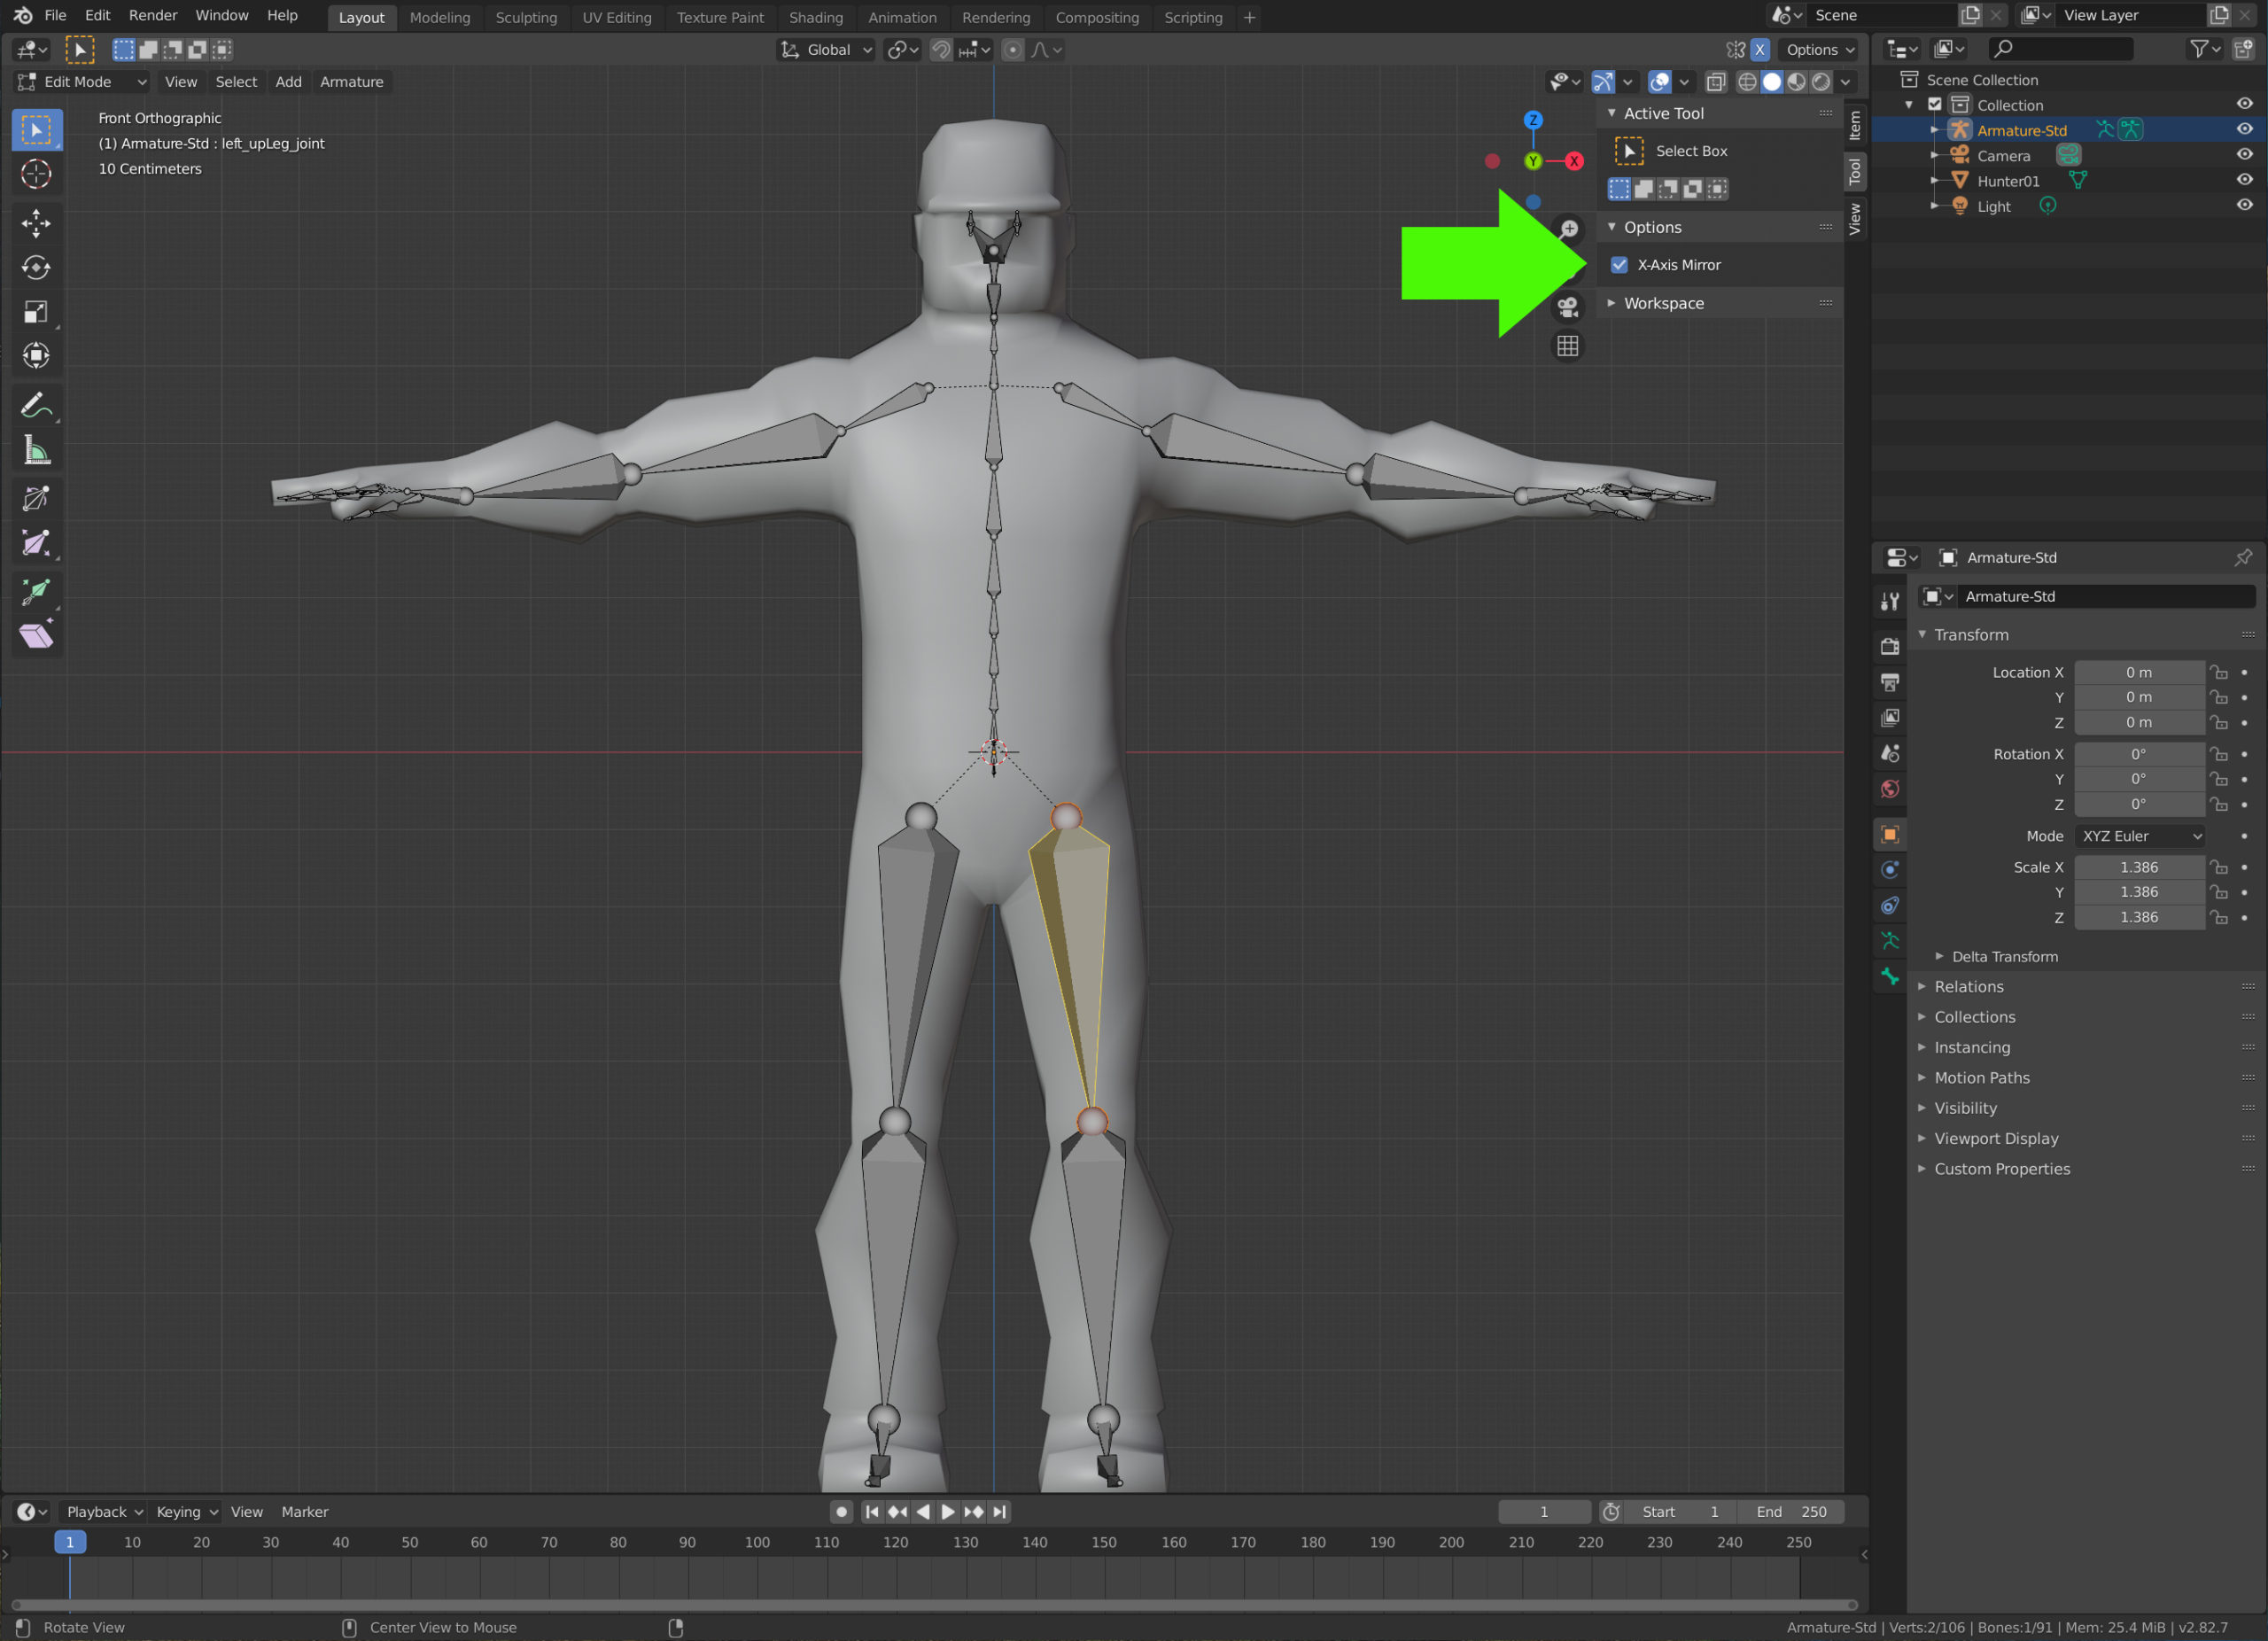
To do that, select the skeleton (armature), change to "Edit Mode" and move bones to fit the joints.
Enable X mirroring so all the changes can be applied automatically in both sides.
5- Assign the skeleton to your model with automatic weights
Up to this point we have the skeleton modified according to the model, then we just have to assign the skeleton to the model.
As you have noticed, what we have done is the rigging process, nothing really new. Yo can find pretty good tutorials about rigging.
Ok, to assign the skeleton to the model we have to change to "Object Mode" then select the model (the mesh) and after that select the skeleton (the order is important because the last selected will become the parent) and then right click and select the option "Parent -> Armature Deform With Automatic Weights".
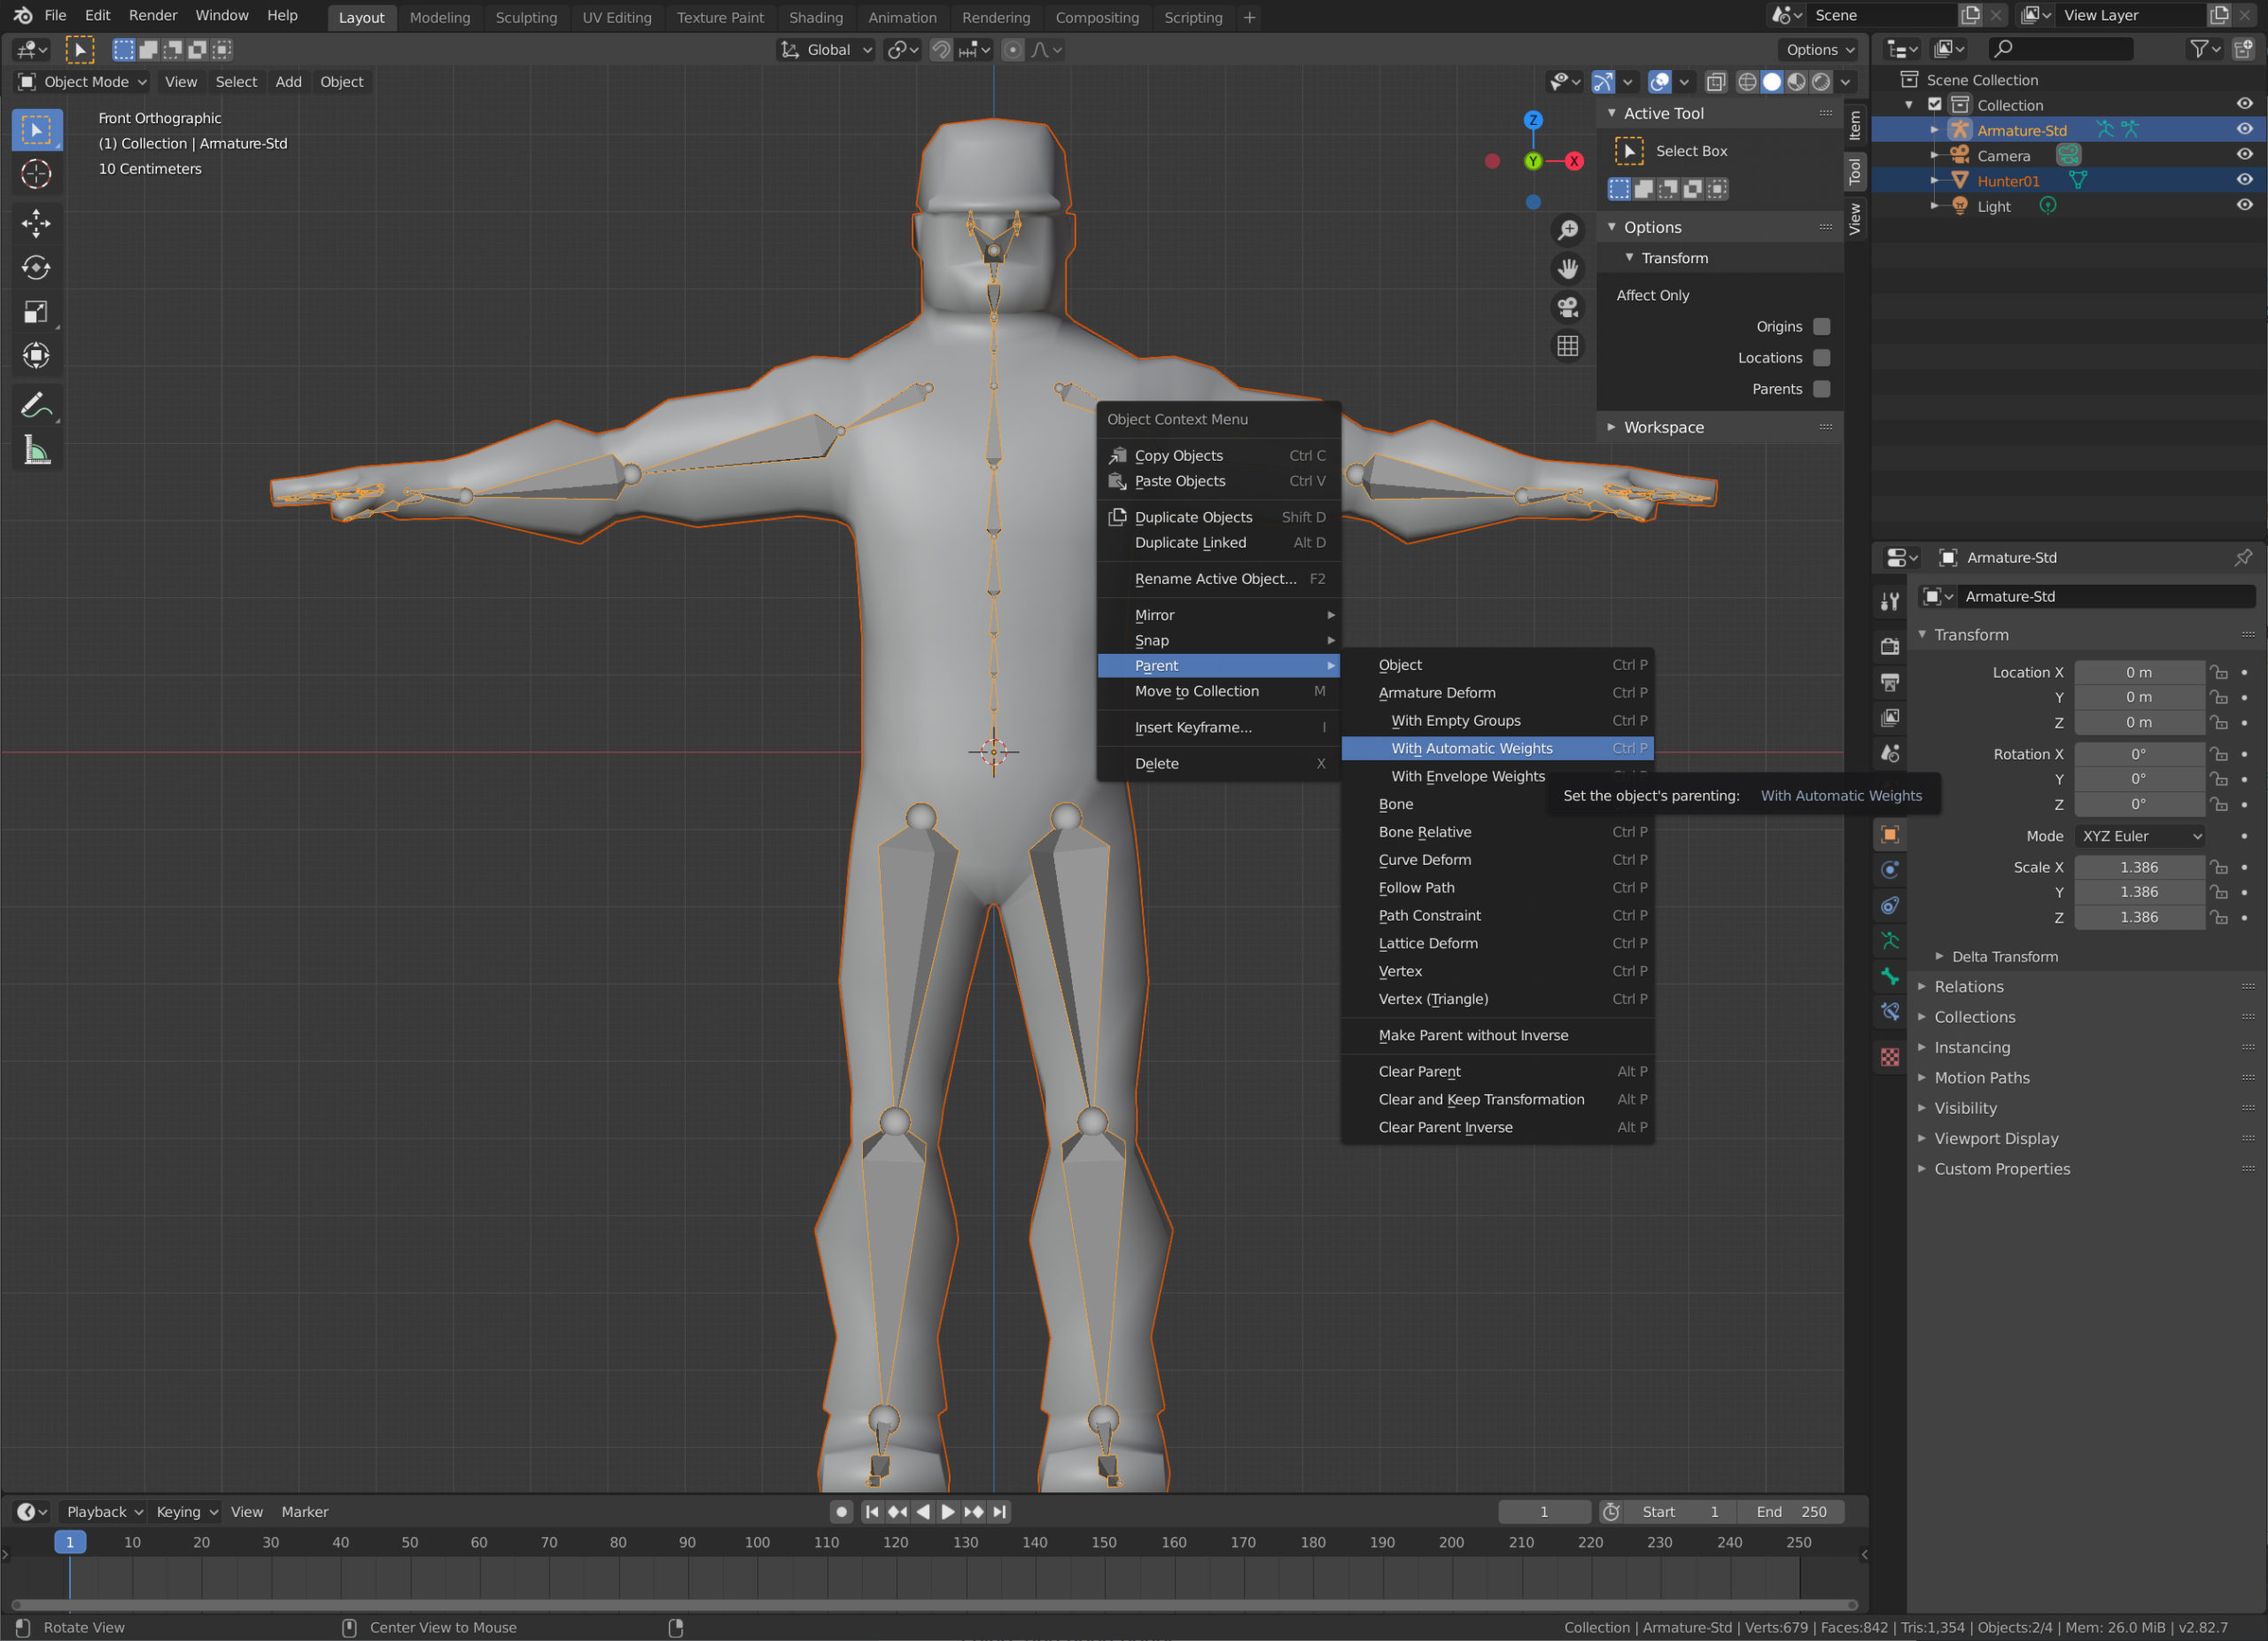
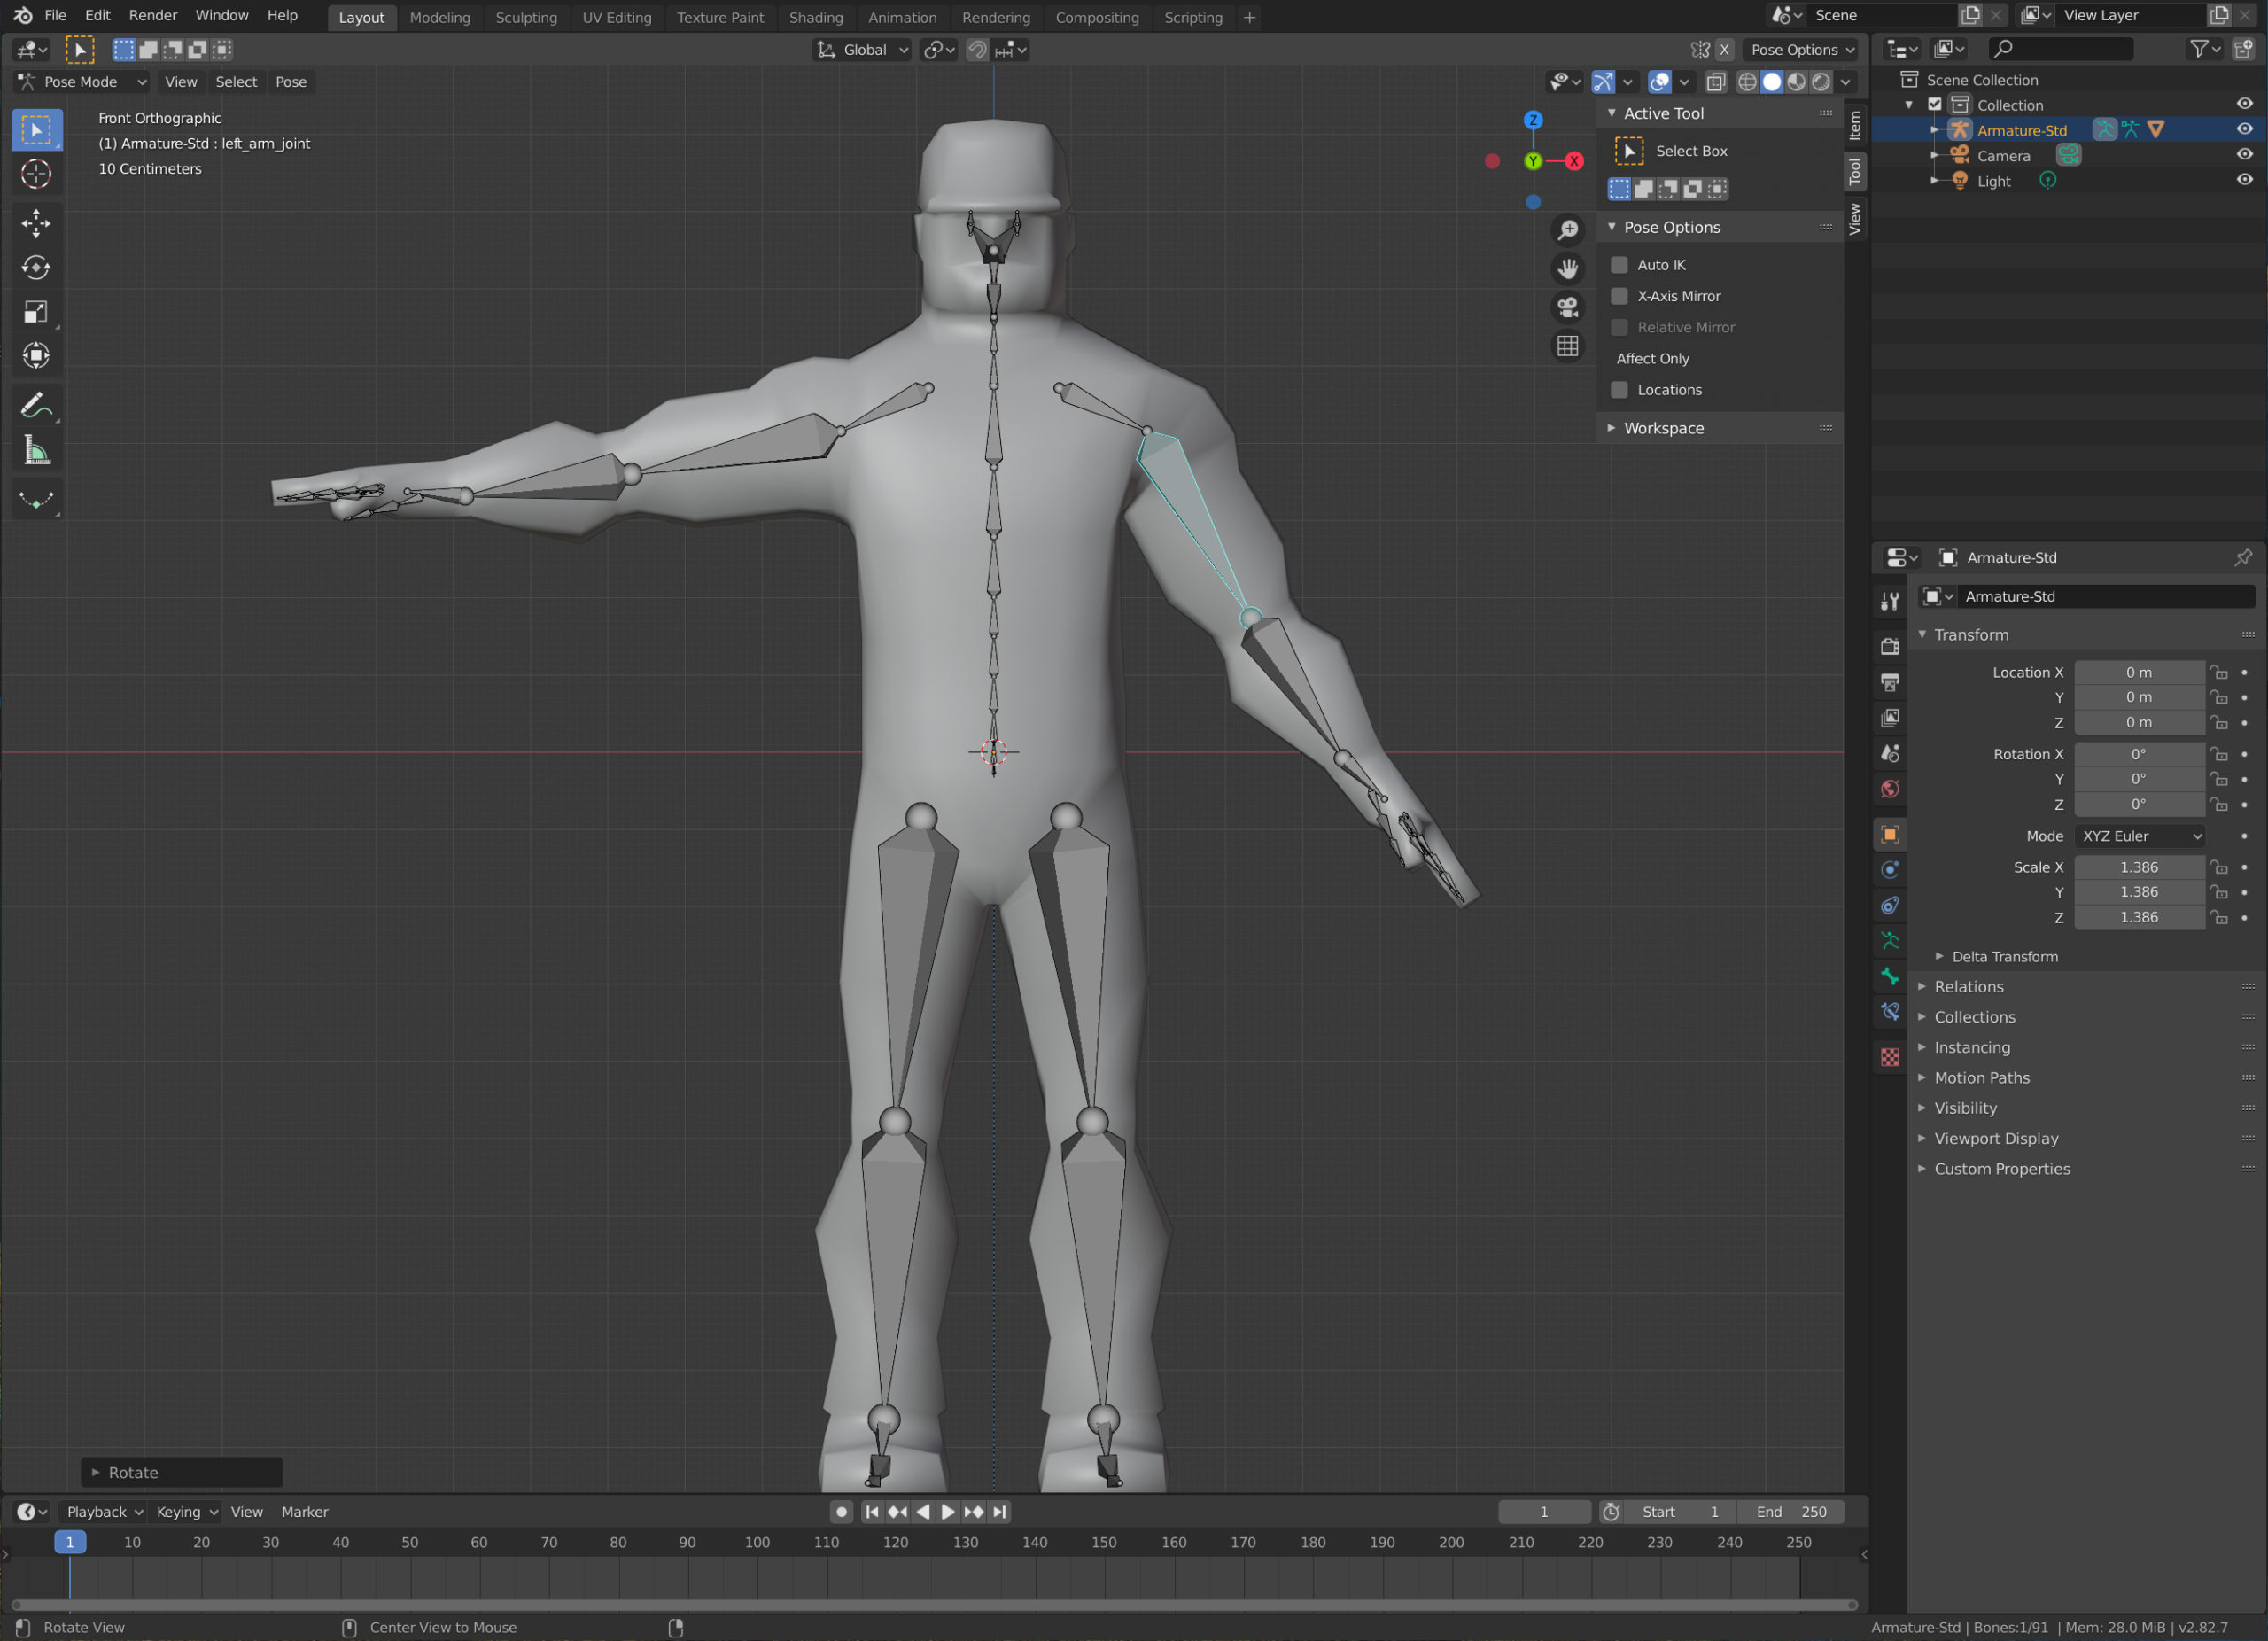
Done! To check that everything is working fine you can select the skeleton and change to "Pose Mode" then select for example the arm bone and rotate it, you will see how the model follows the movement.
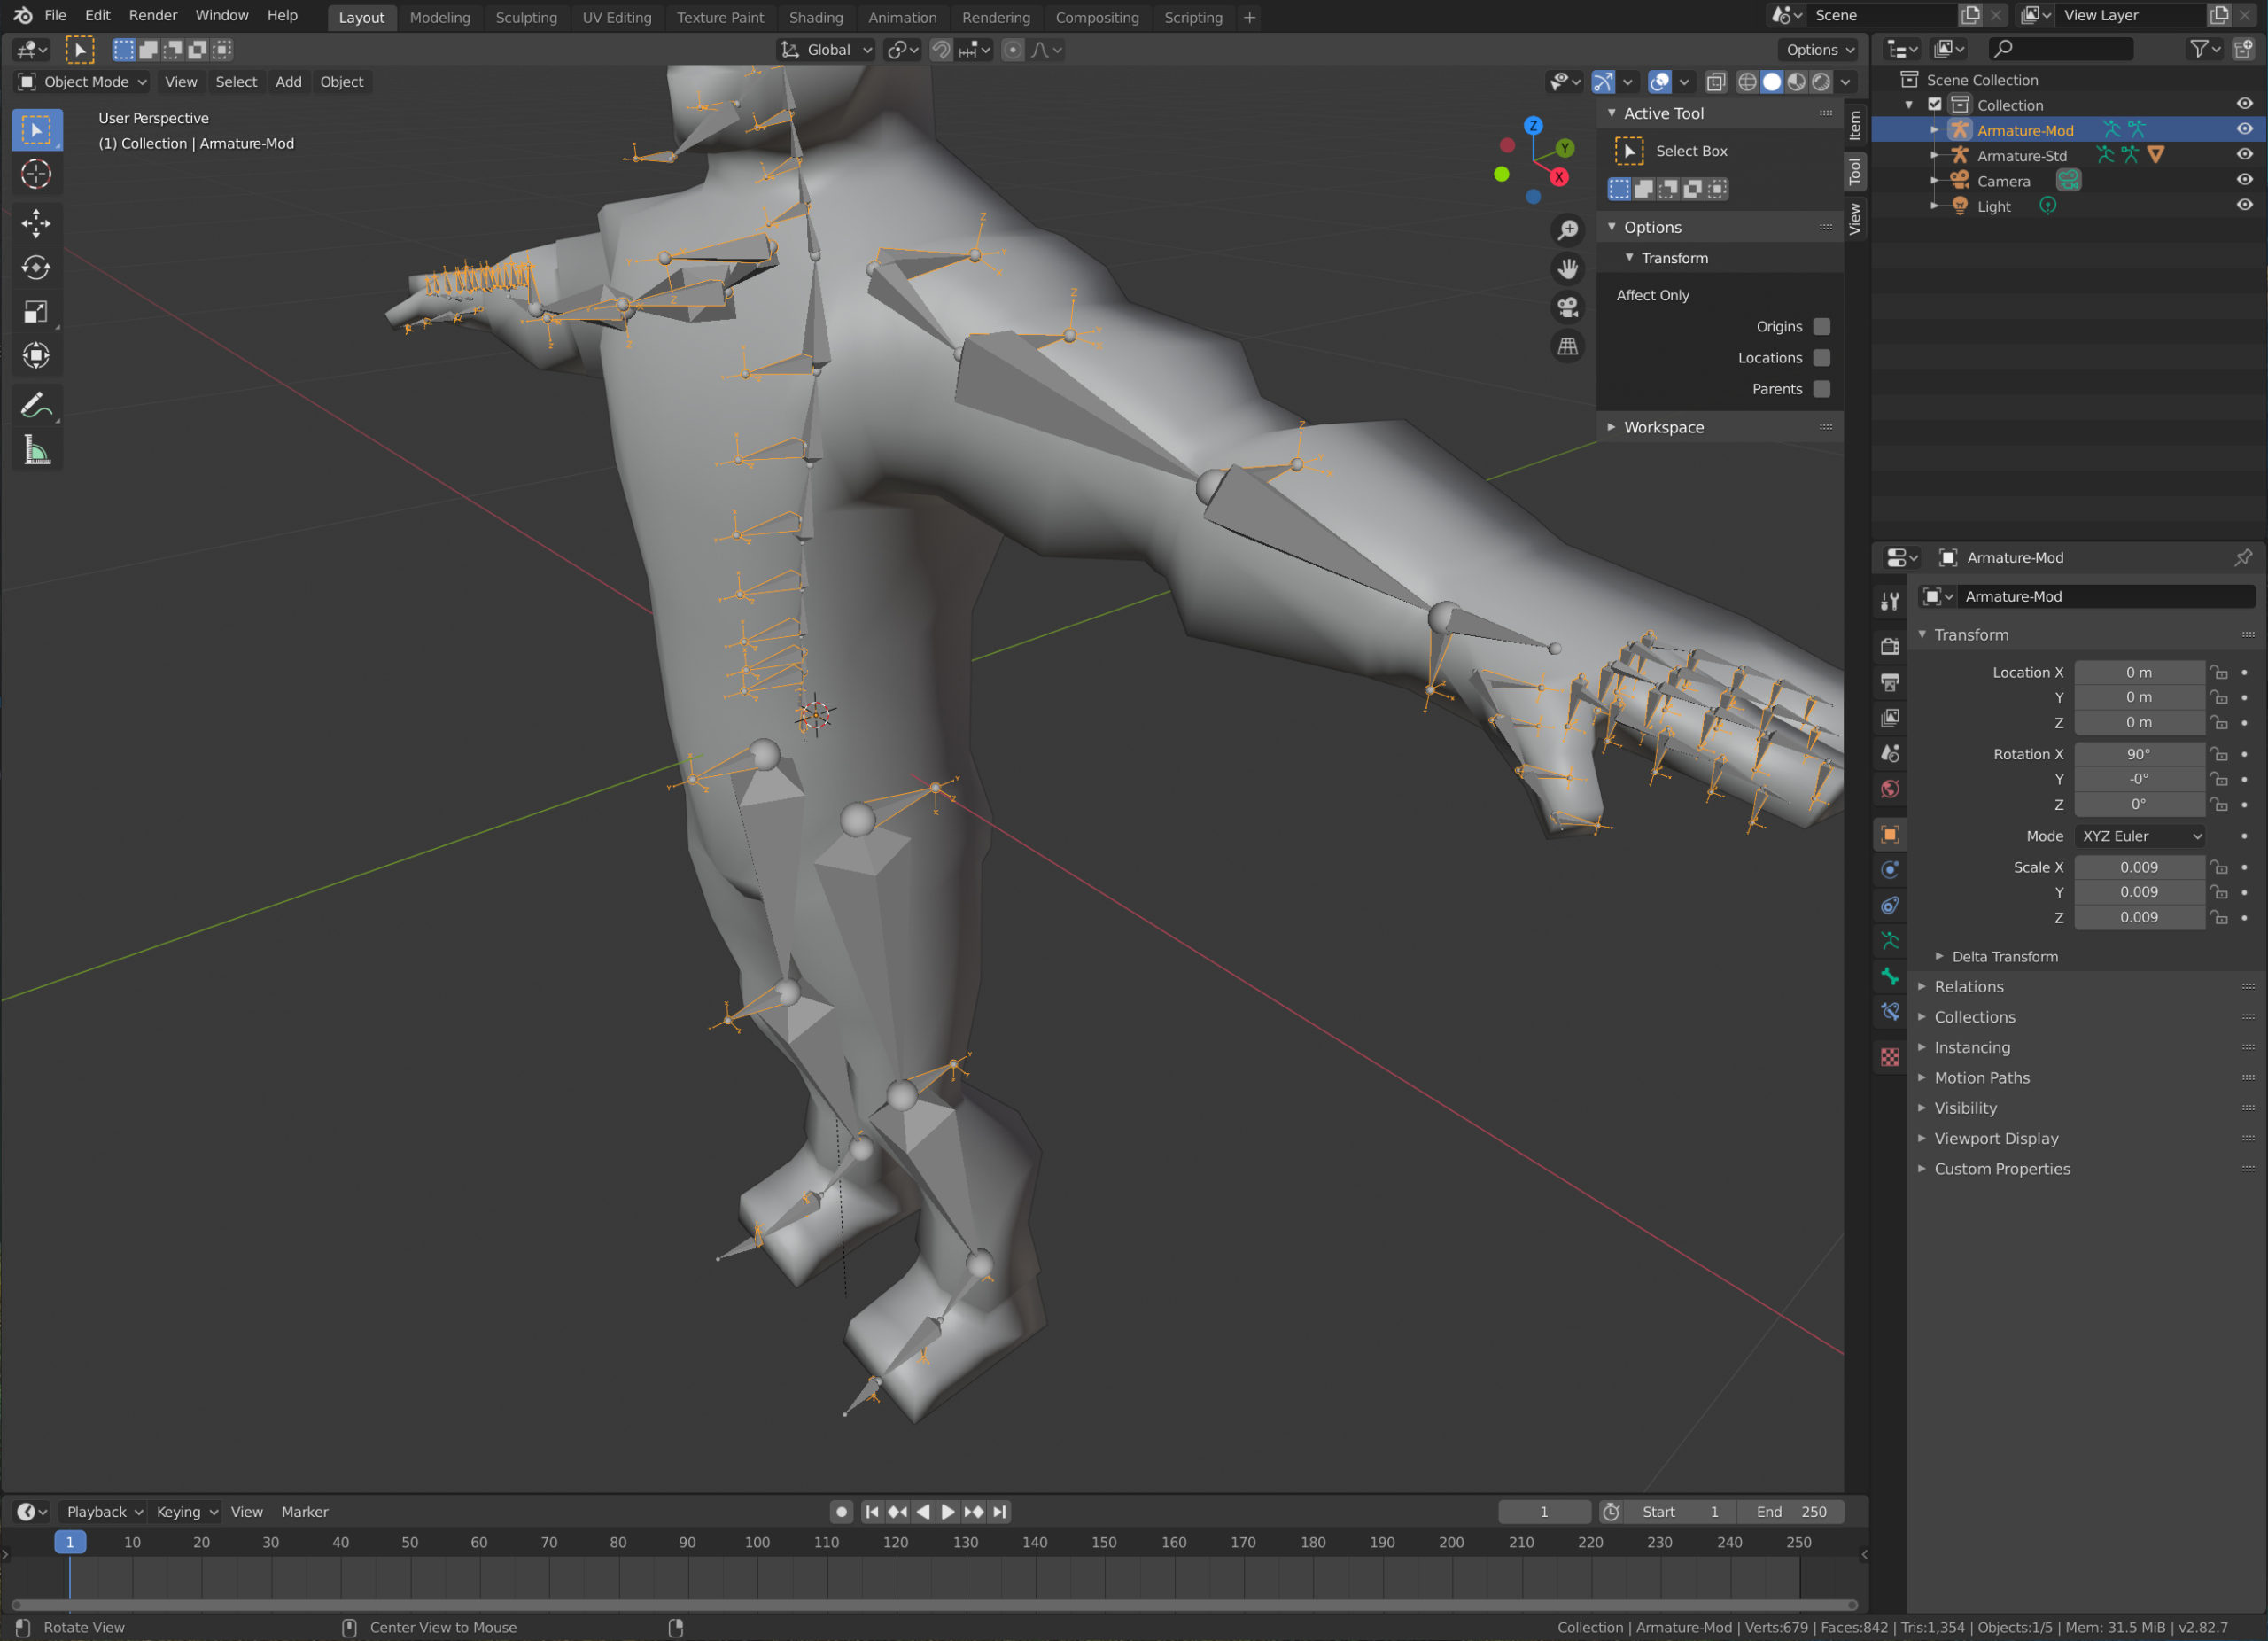
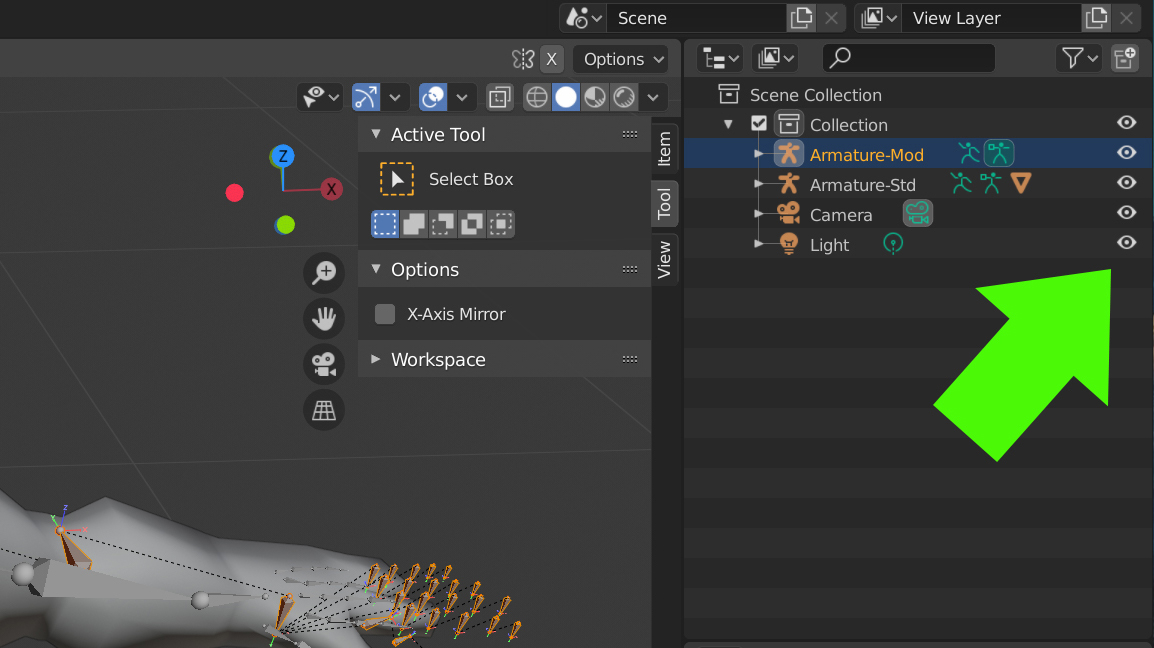
6- Append the joints based skeleton to your scene from the reference file
In the same way we appended the standard skeleton we have to append the joint based skeleton, just follow tha same process but this time with the "Armature-Mod" skeleton.
You will notice immediately that the orientation of the bones is totally different because the bones just represent joints, this is way they are not connected and the length of the bones is irrelevant.
7- Adjust the joints based skeleton according your model shape
Despite we already have a functional skeleton, we need to use the joint based skeleton because is required by the AR Body tracking framework.
It is important to mention that we used the previous skeleton to generate the vertex groups automatically (a vertex group is created per bone) and we want to apply those vertex groups to the joint based skeleton.
This simplifies a lot the rigging process, because in other case we should do the weight paint manually for each bone in the joint based skeleton.
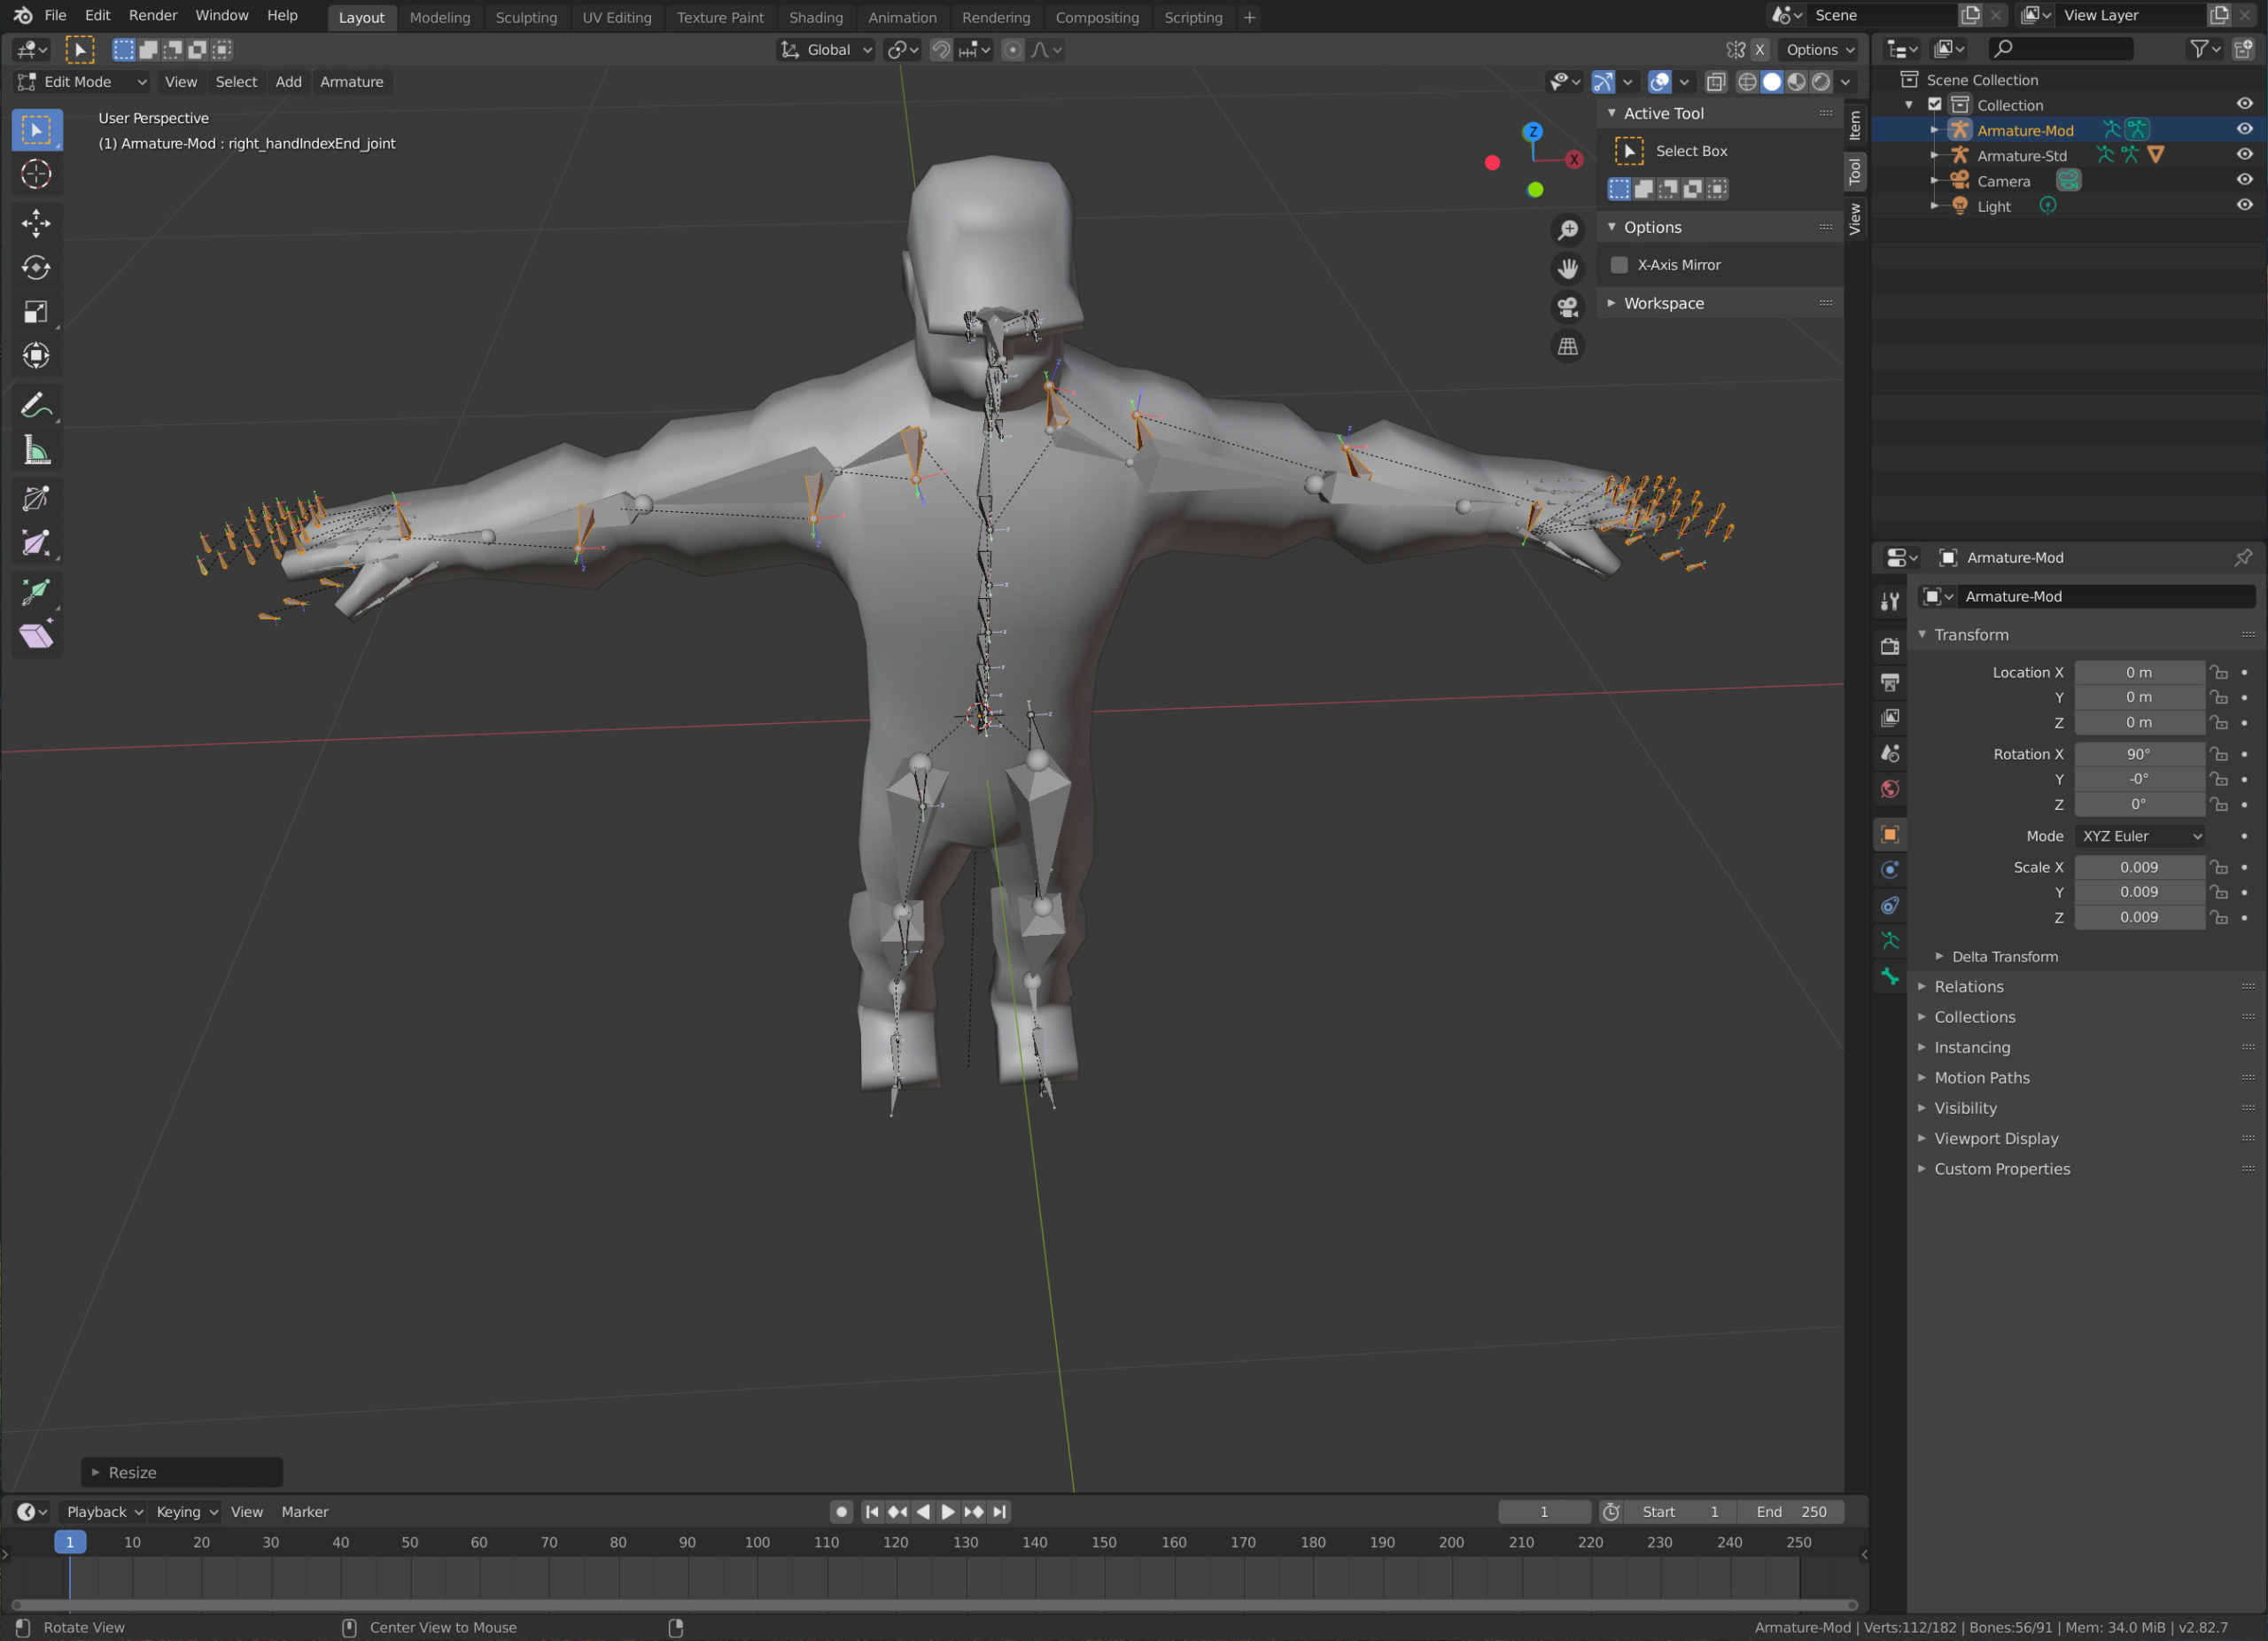
After that brief explanation, we will proceed to adjust the bones. To do that we select the new skeleton and change to "Edit Mode" and as we did before, we have to move the bones according to the position of the joints.
The big difference in this step is that we can't use the X mirroring because is not a standard skeleton, so to perform all modification I strongly recommend to use scales over X.
For example, select the bones for both arms then apply scale over X ("S" key then "X") you will see how bones positions are contracted or expanded over X axis, use this technique to adapt all bones.
Tip: To avoid get confused with the other skeleton you can hide it with the eye icon in the scene hierarchy.
OK, at the end of this step we should have the joint based skeleton ready for our model.

8- Assign the joints based skeleton to your model preserving the vertex groups
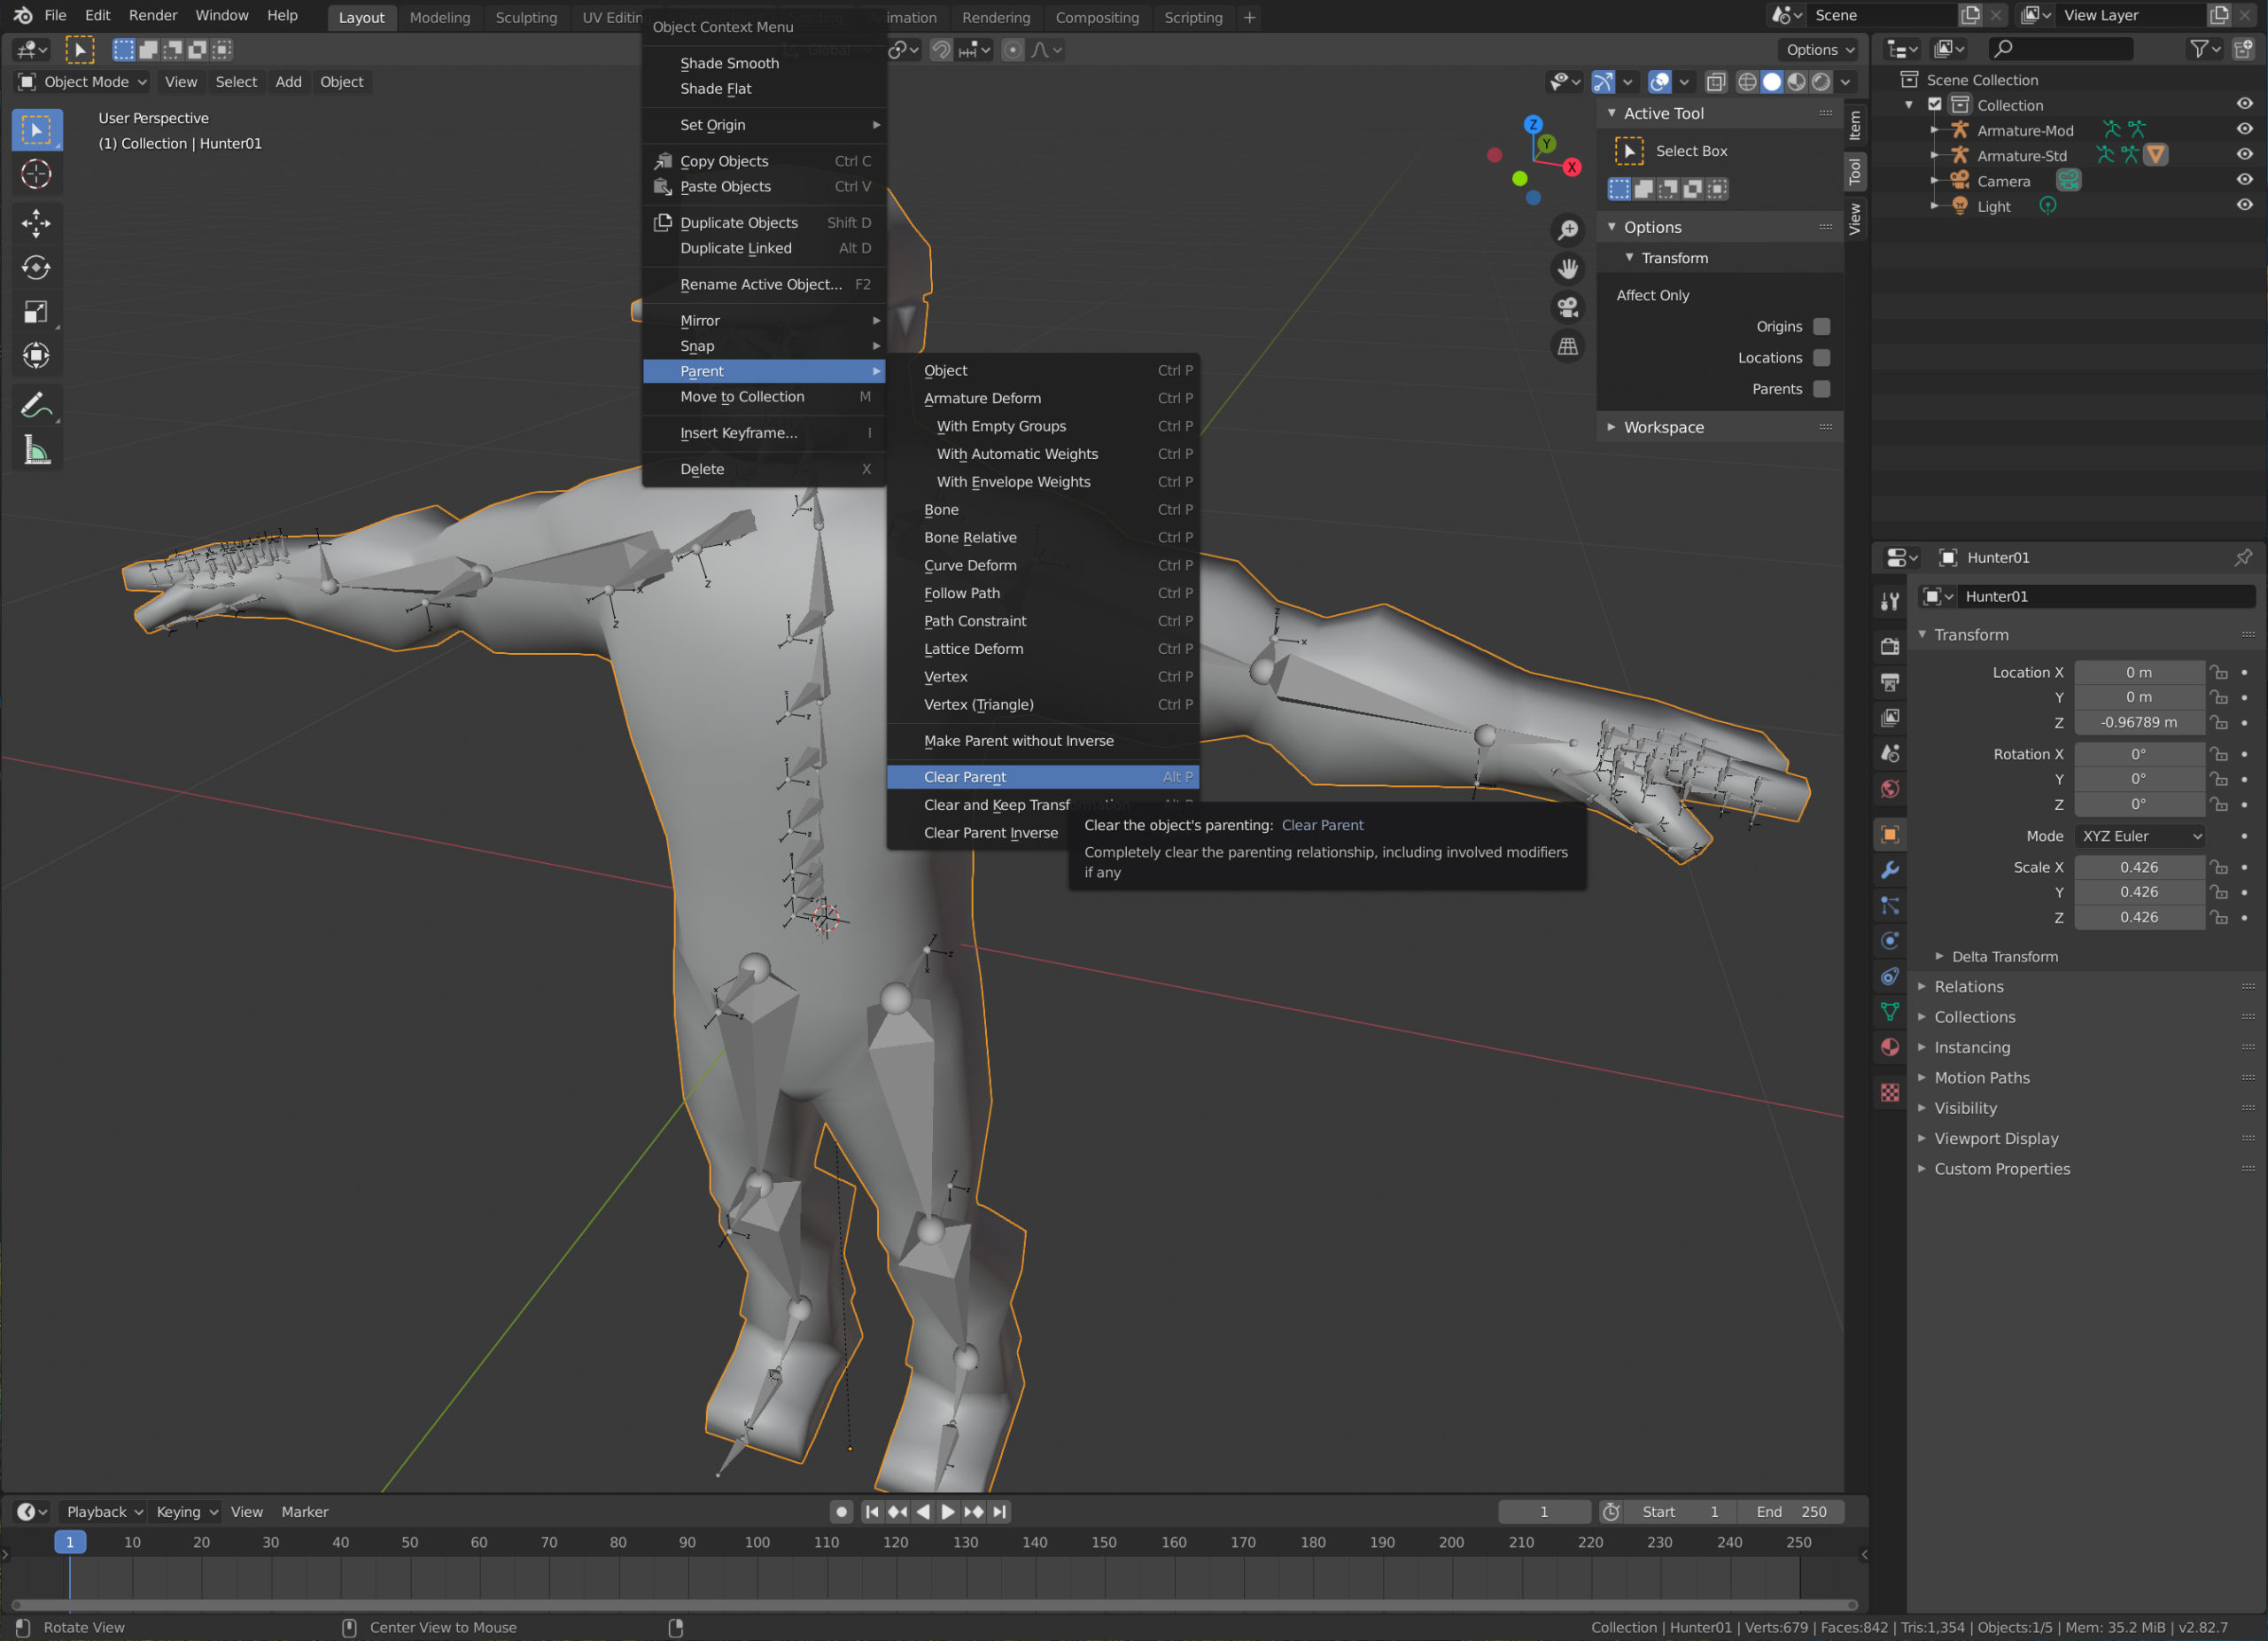
First we need to clear the parent link between the model and the previous skeleton. In "Object Mode" select the model then right click and select "Parent -> Clear Parent".
With that, the model doesn't have parent but preserves all the vertex groups.
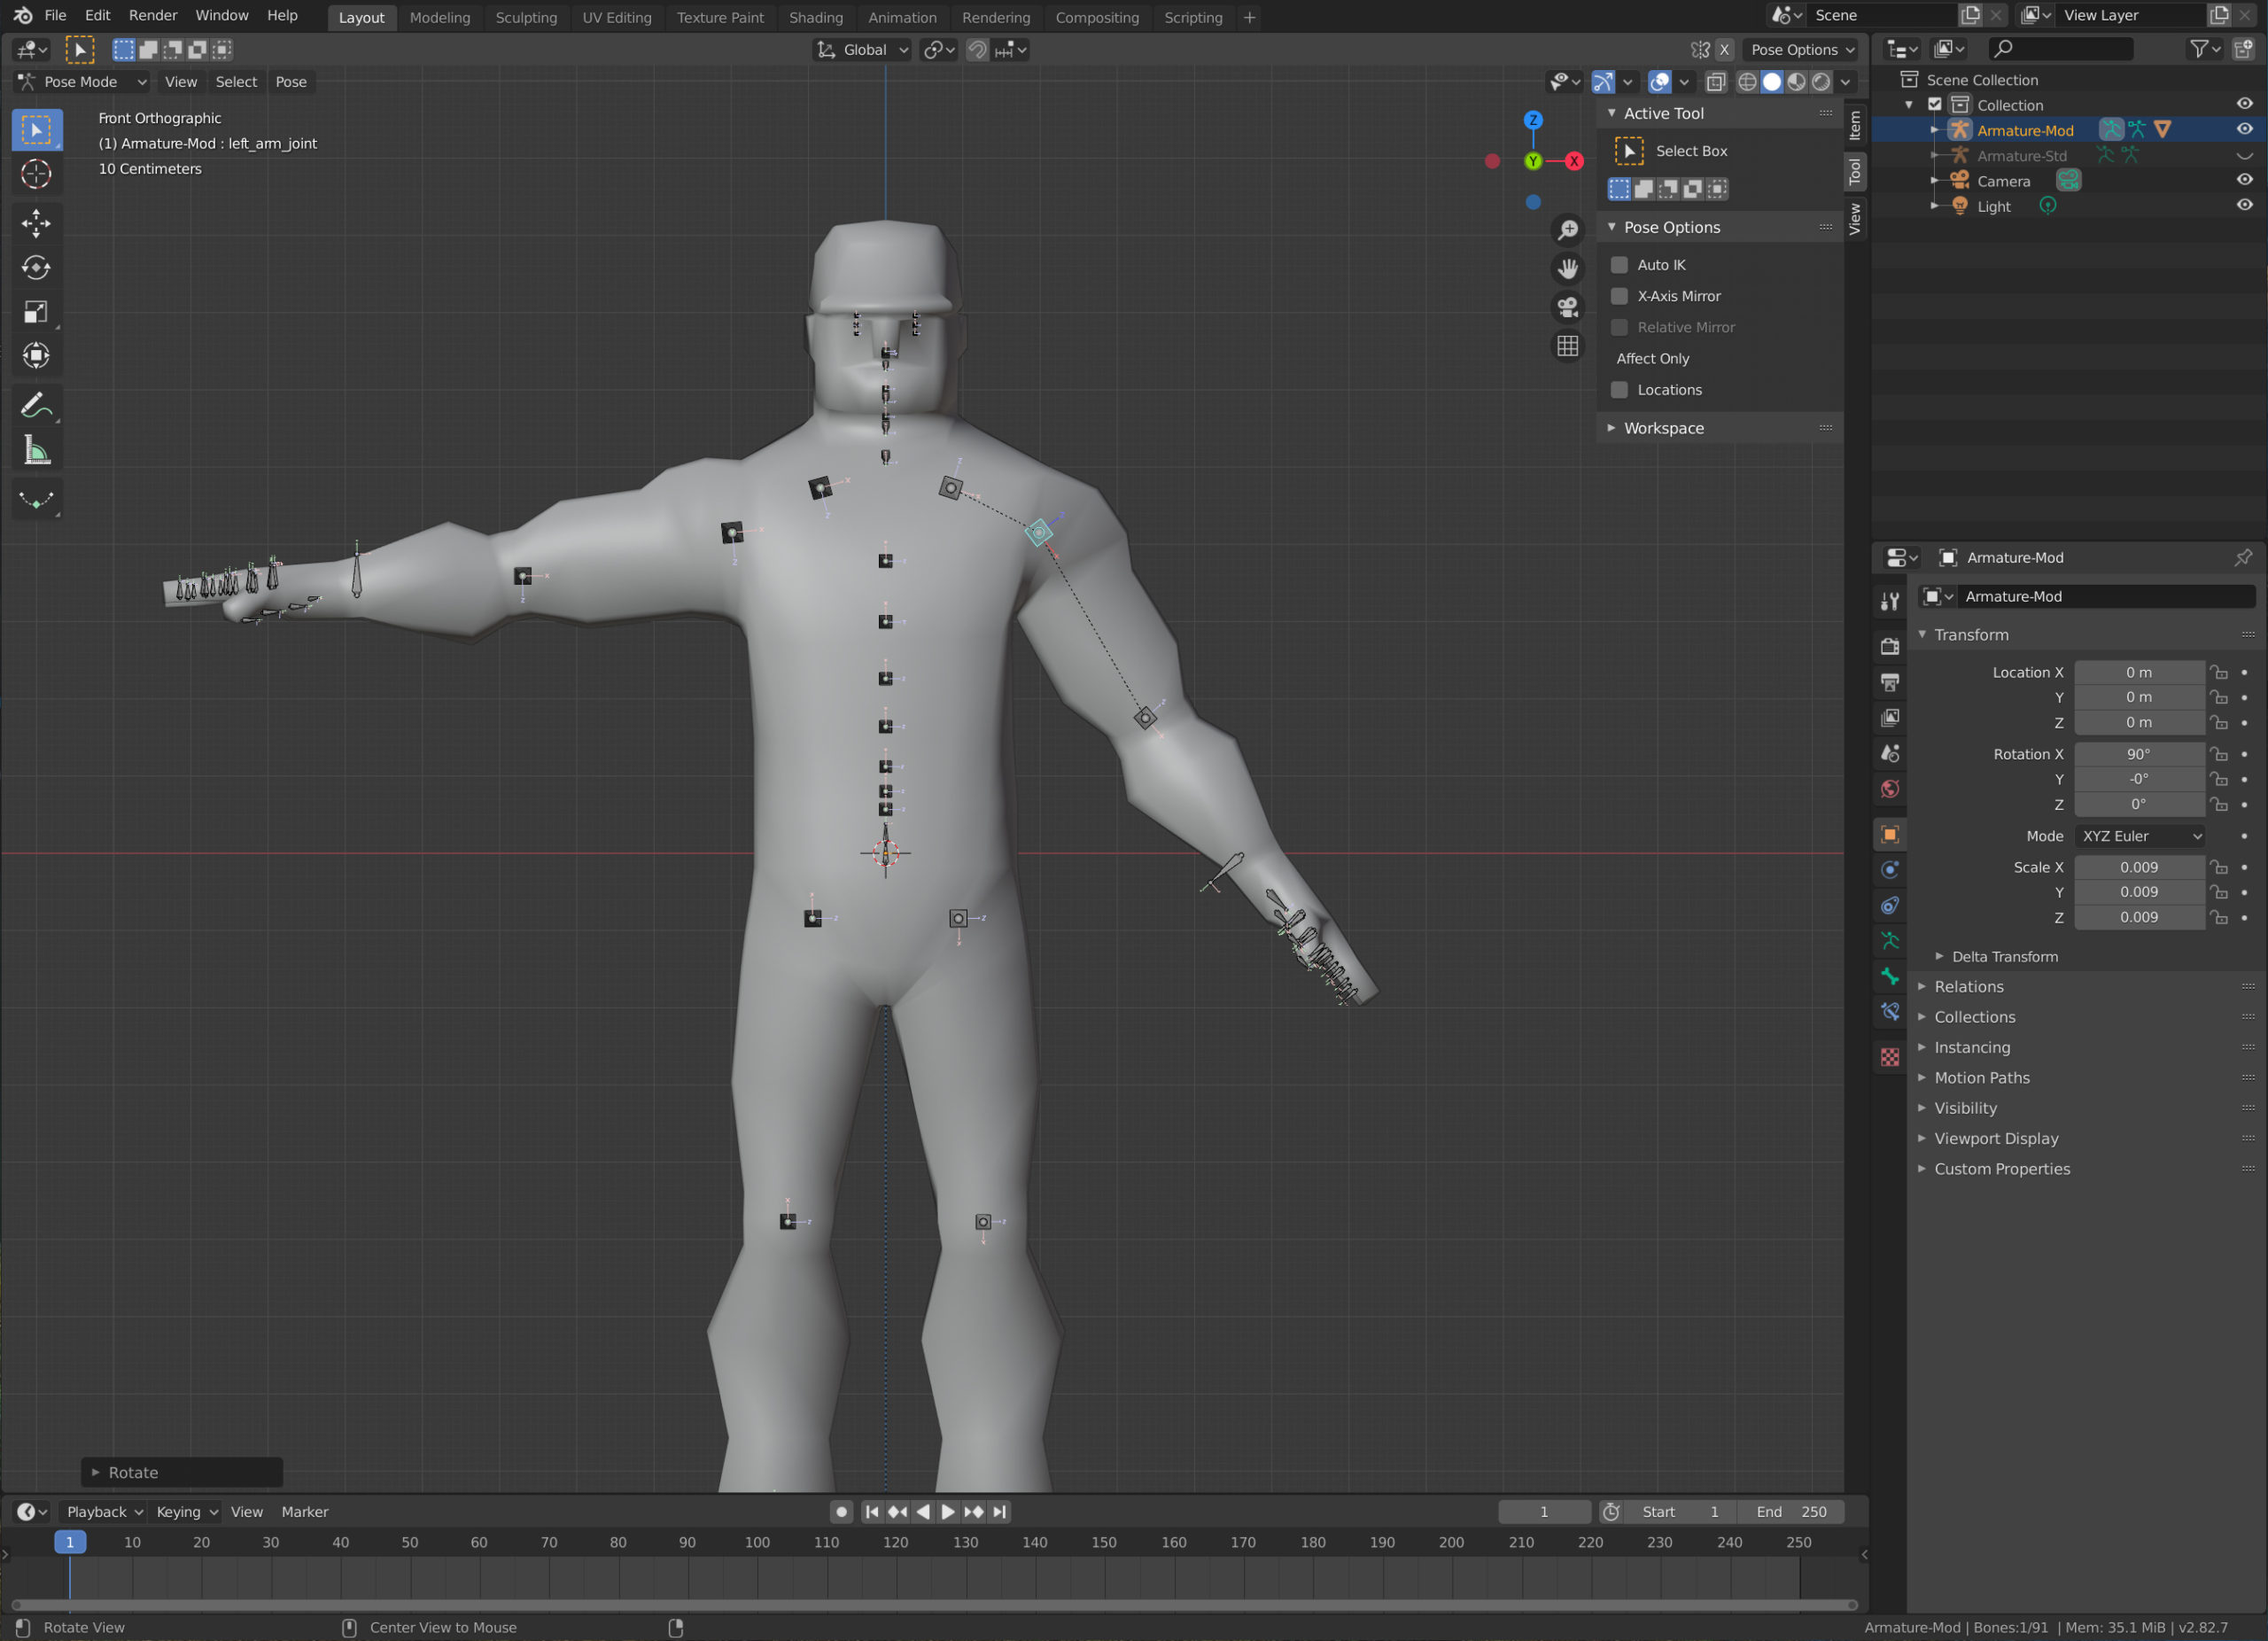
Now let's assign the new skeleton to the model as we did before. Select the model then the skeleton (using shift key), then right click and select "Parent -> Armature Deform".
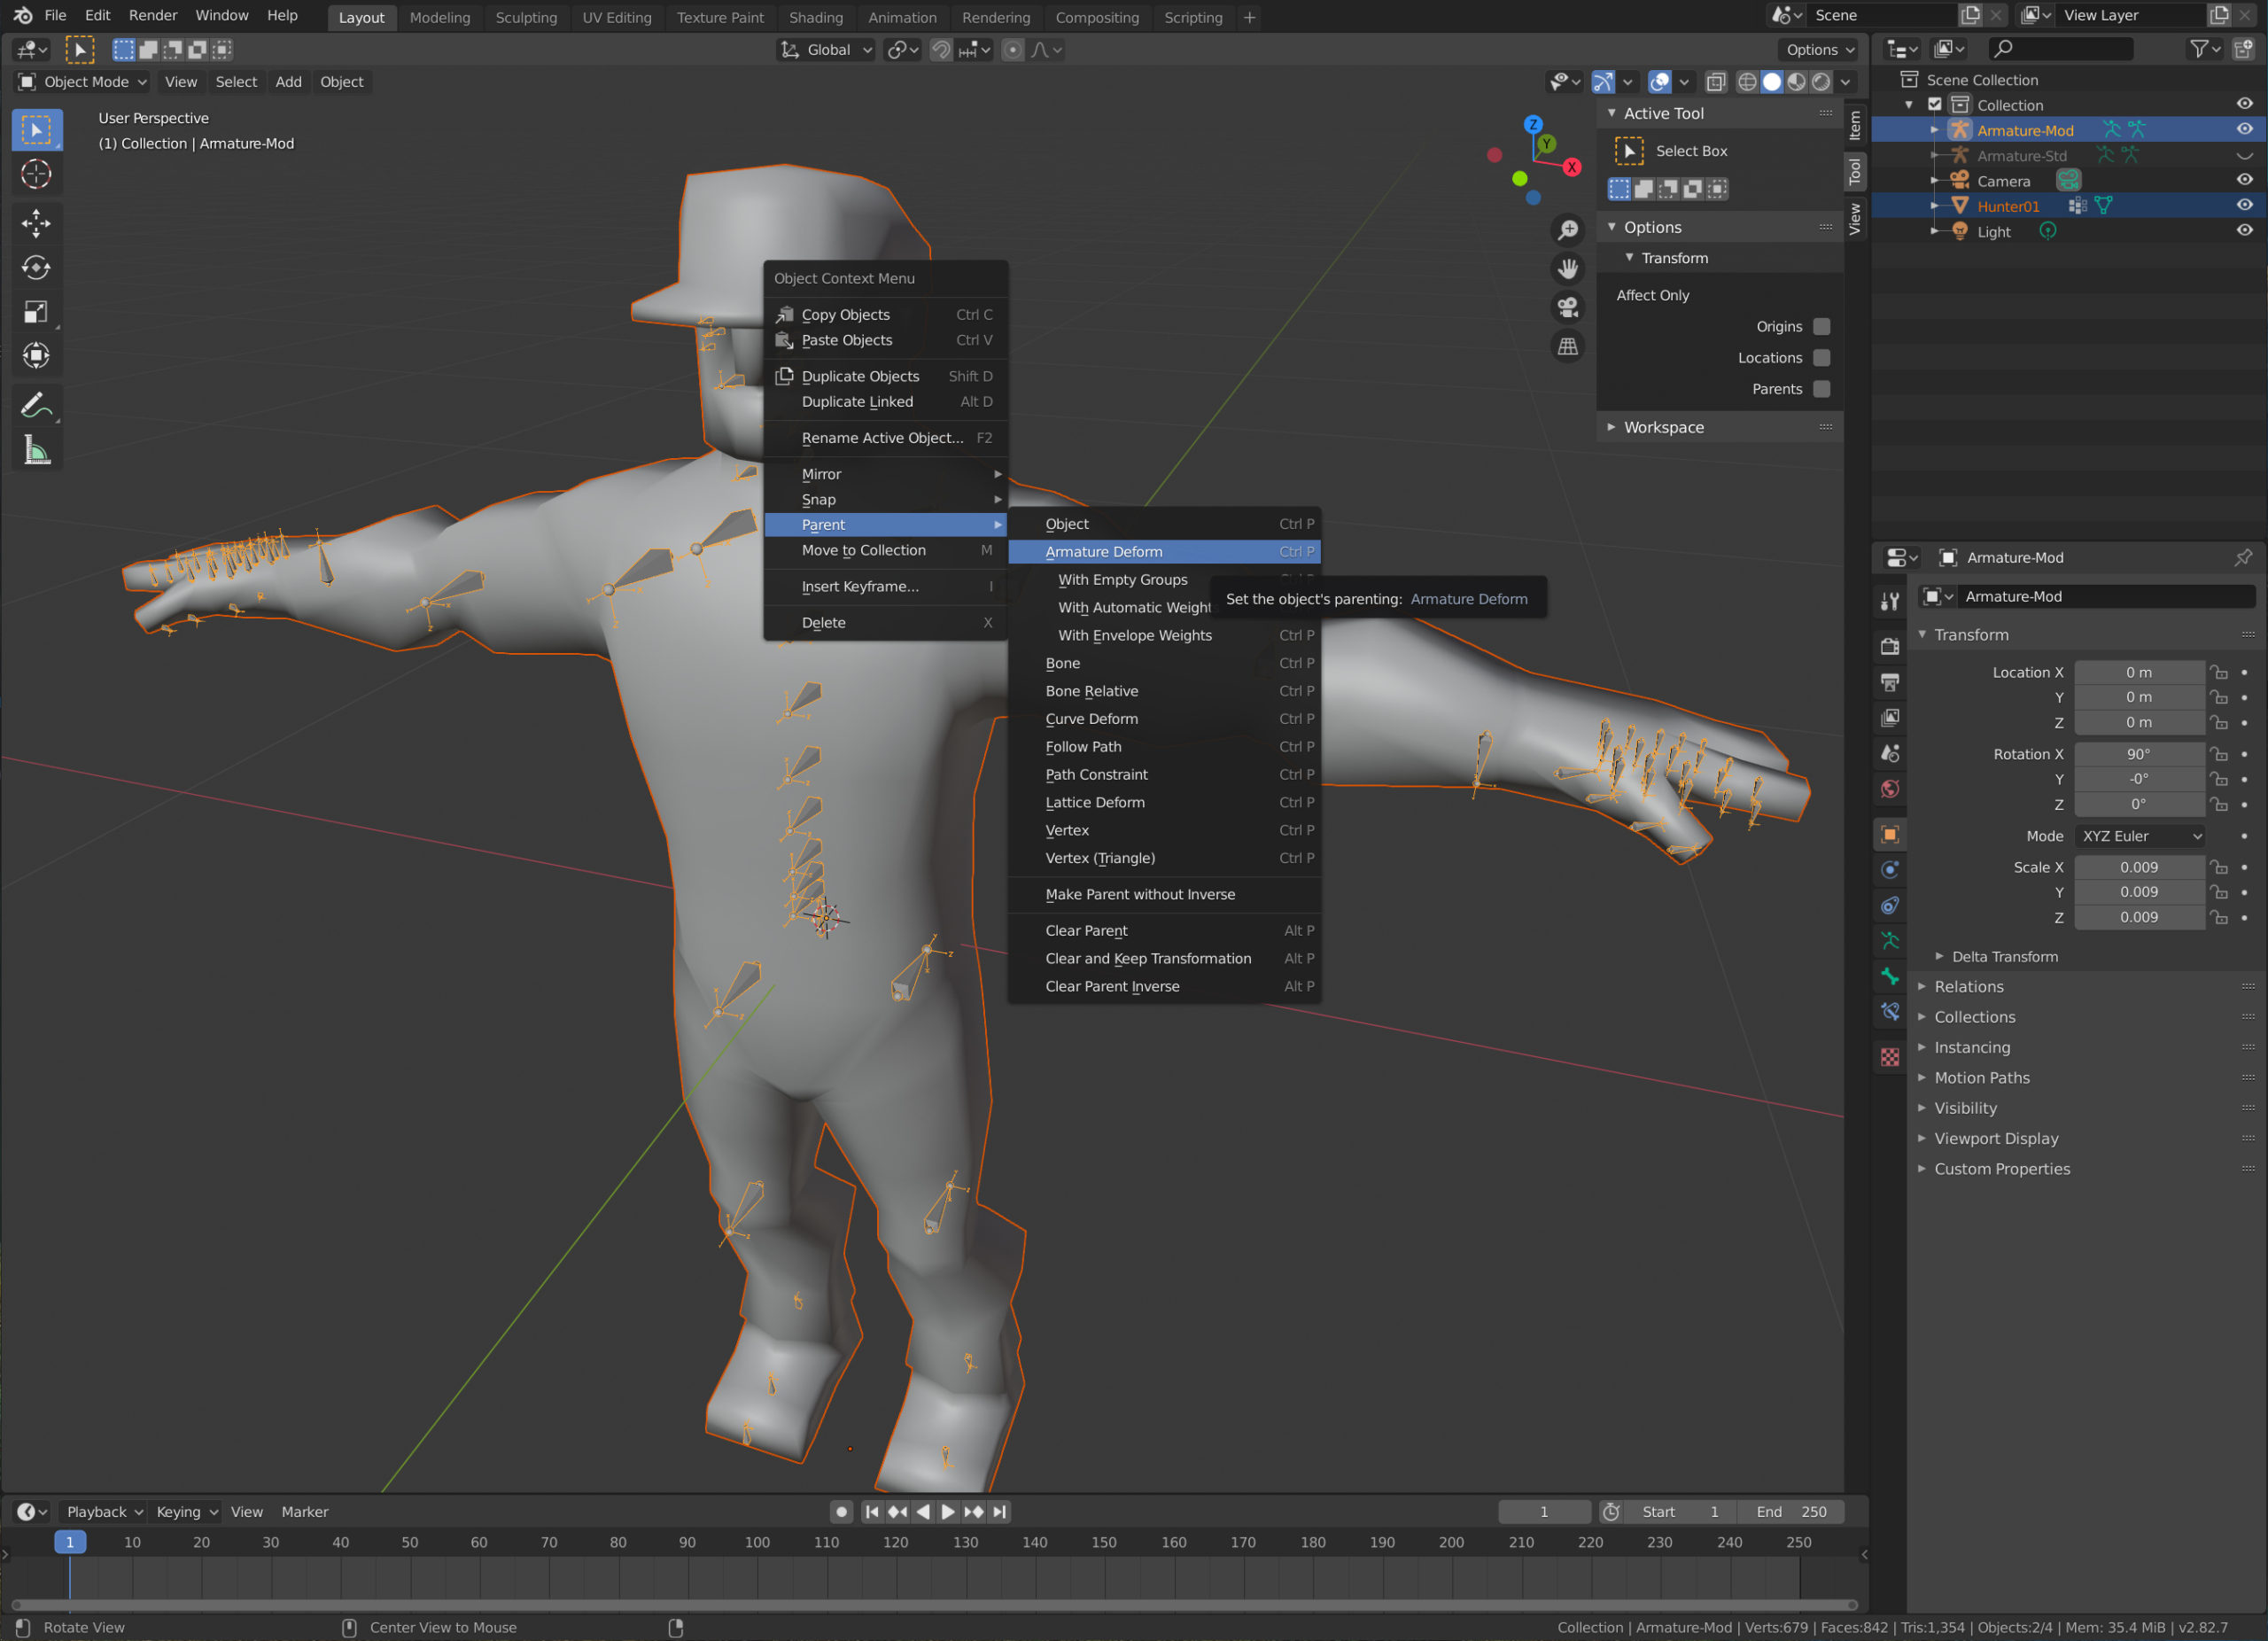
You can check the movement in "Pose Mode" in the same way we did before.
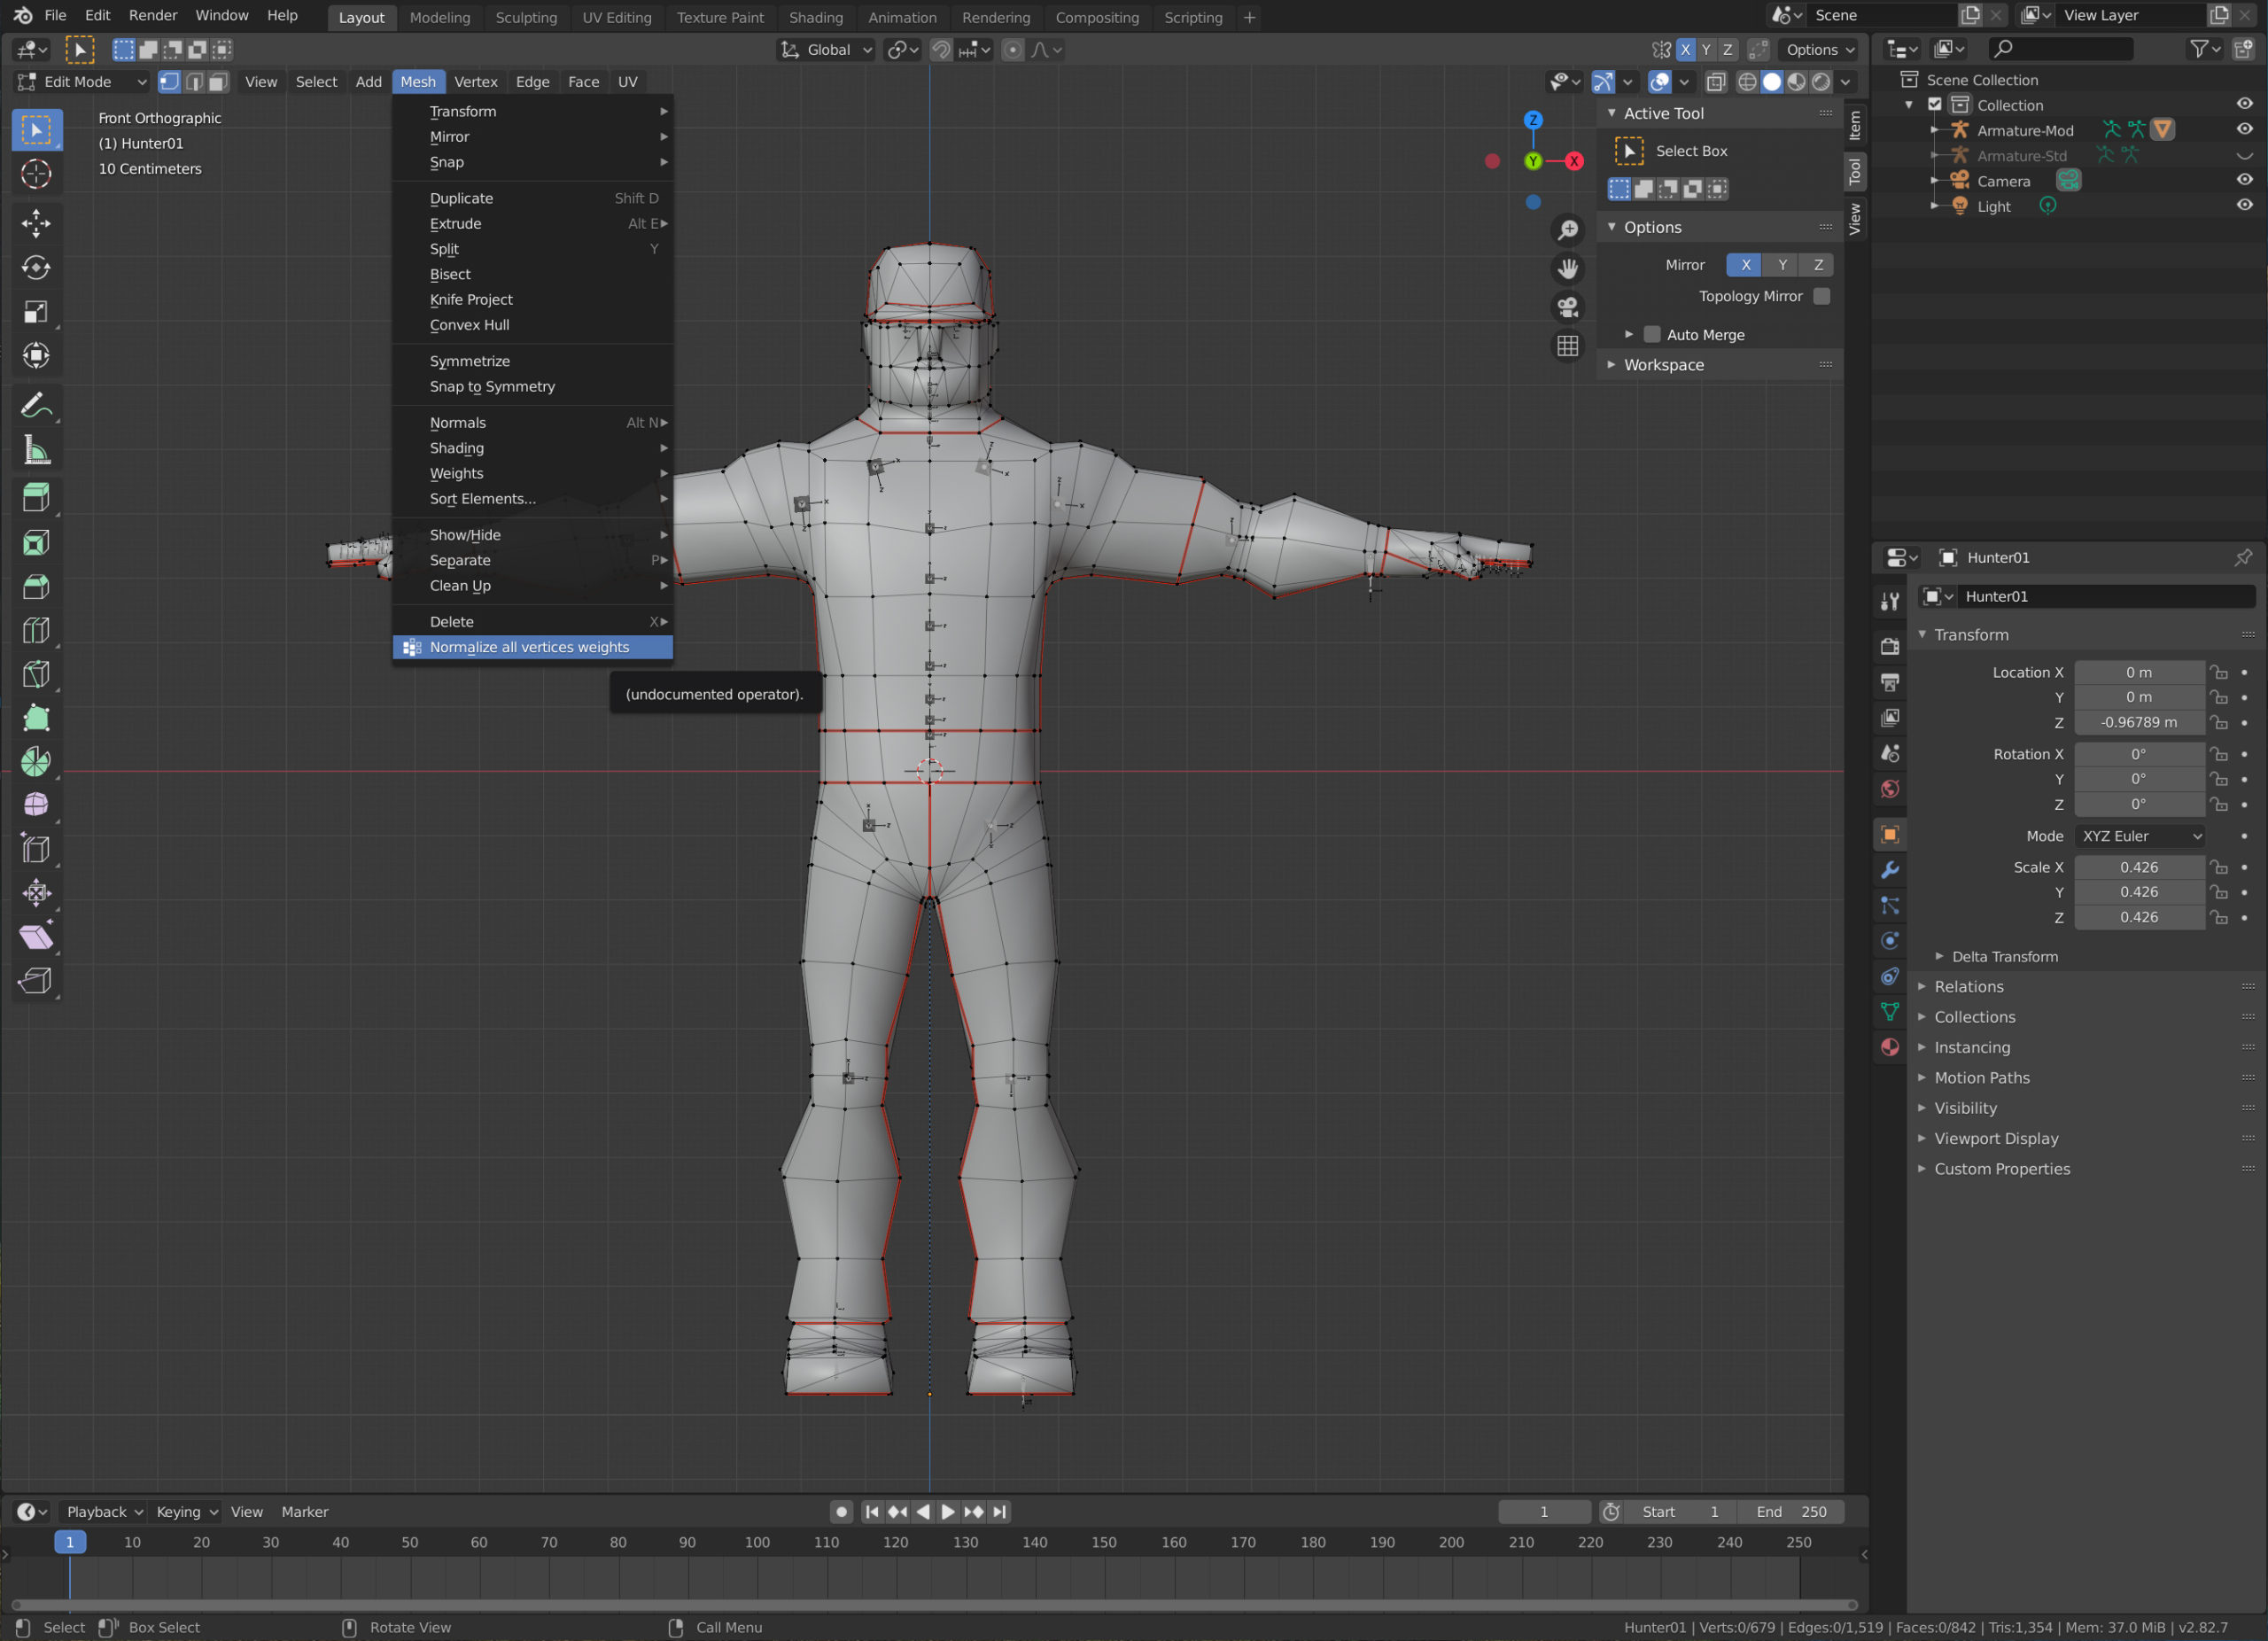
9- Apply the vertex normalization plugin
Before exporting the model, it is necessary to apply the vertex normalization plugin we developed. This is to avoid weird vertex behavior caused by the model loader used in the app.
You can read this article to get a detailed tutorial about how to use the plugin.
Download the plug in here, install it in blender, select the model, change to "Edit mode" and in the menu "Mesh -> Normalize all vertices weights".
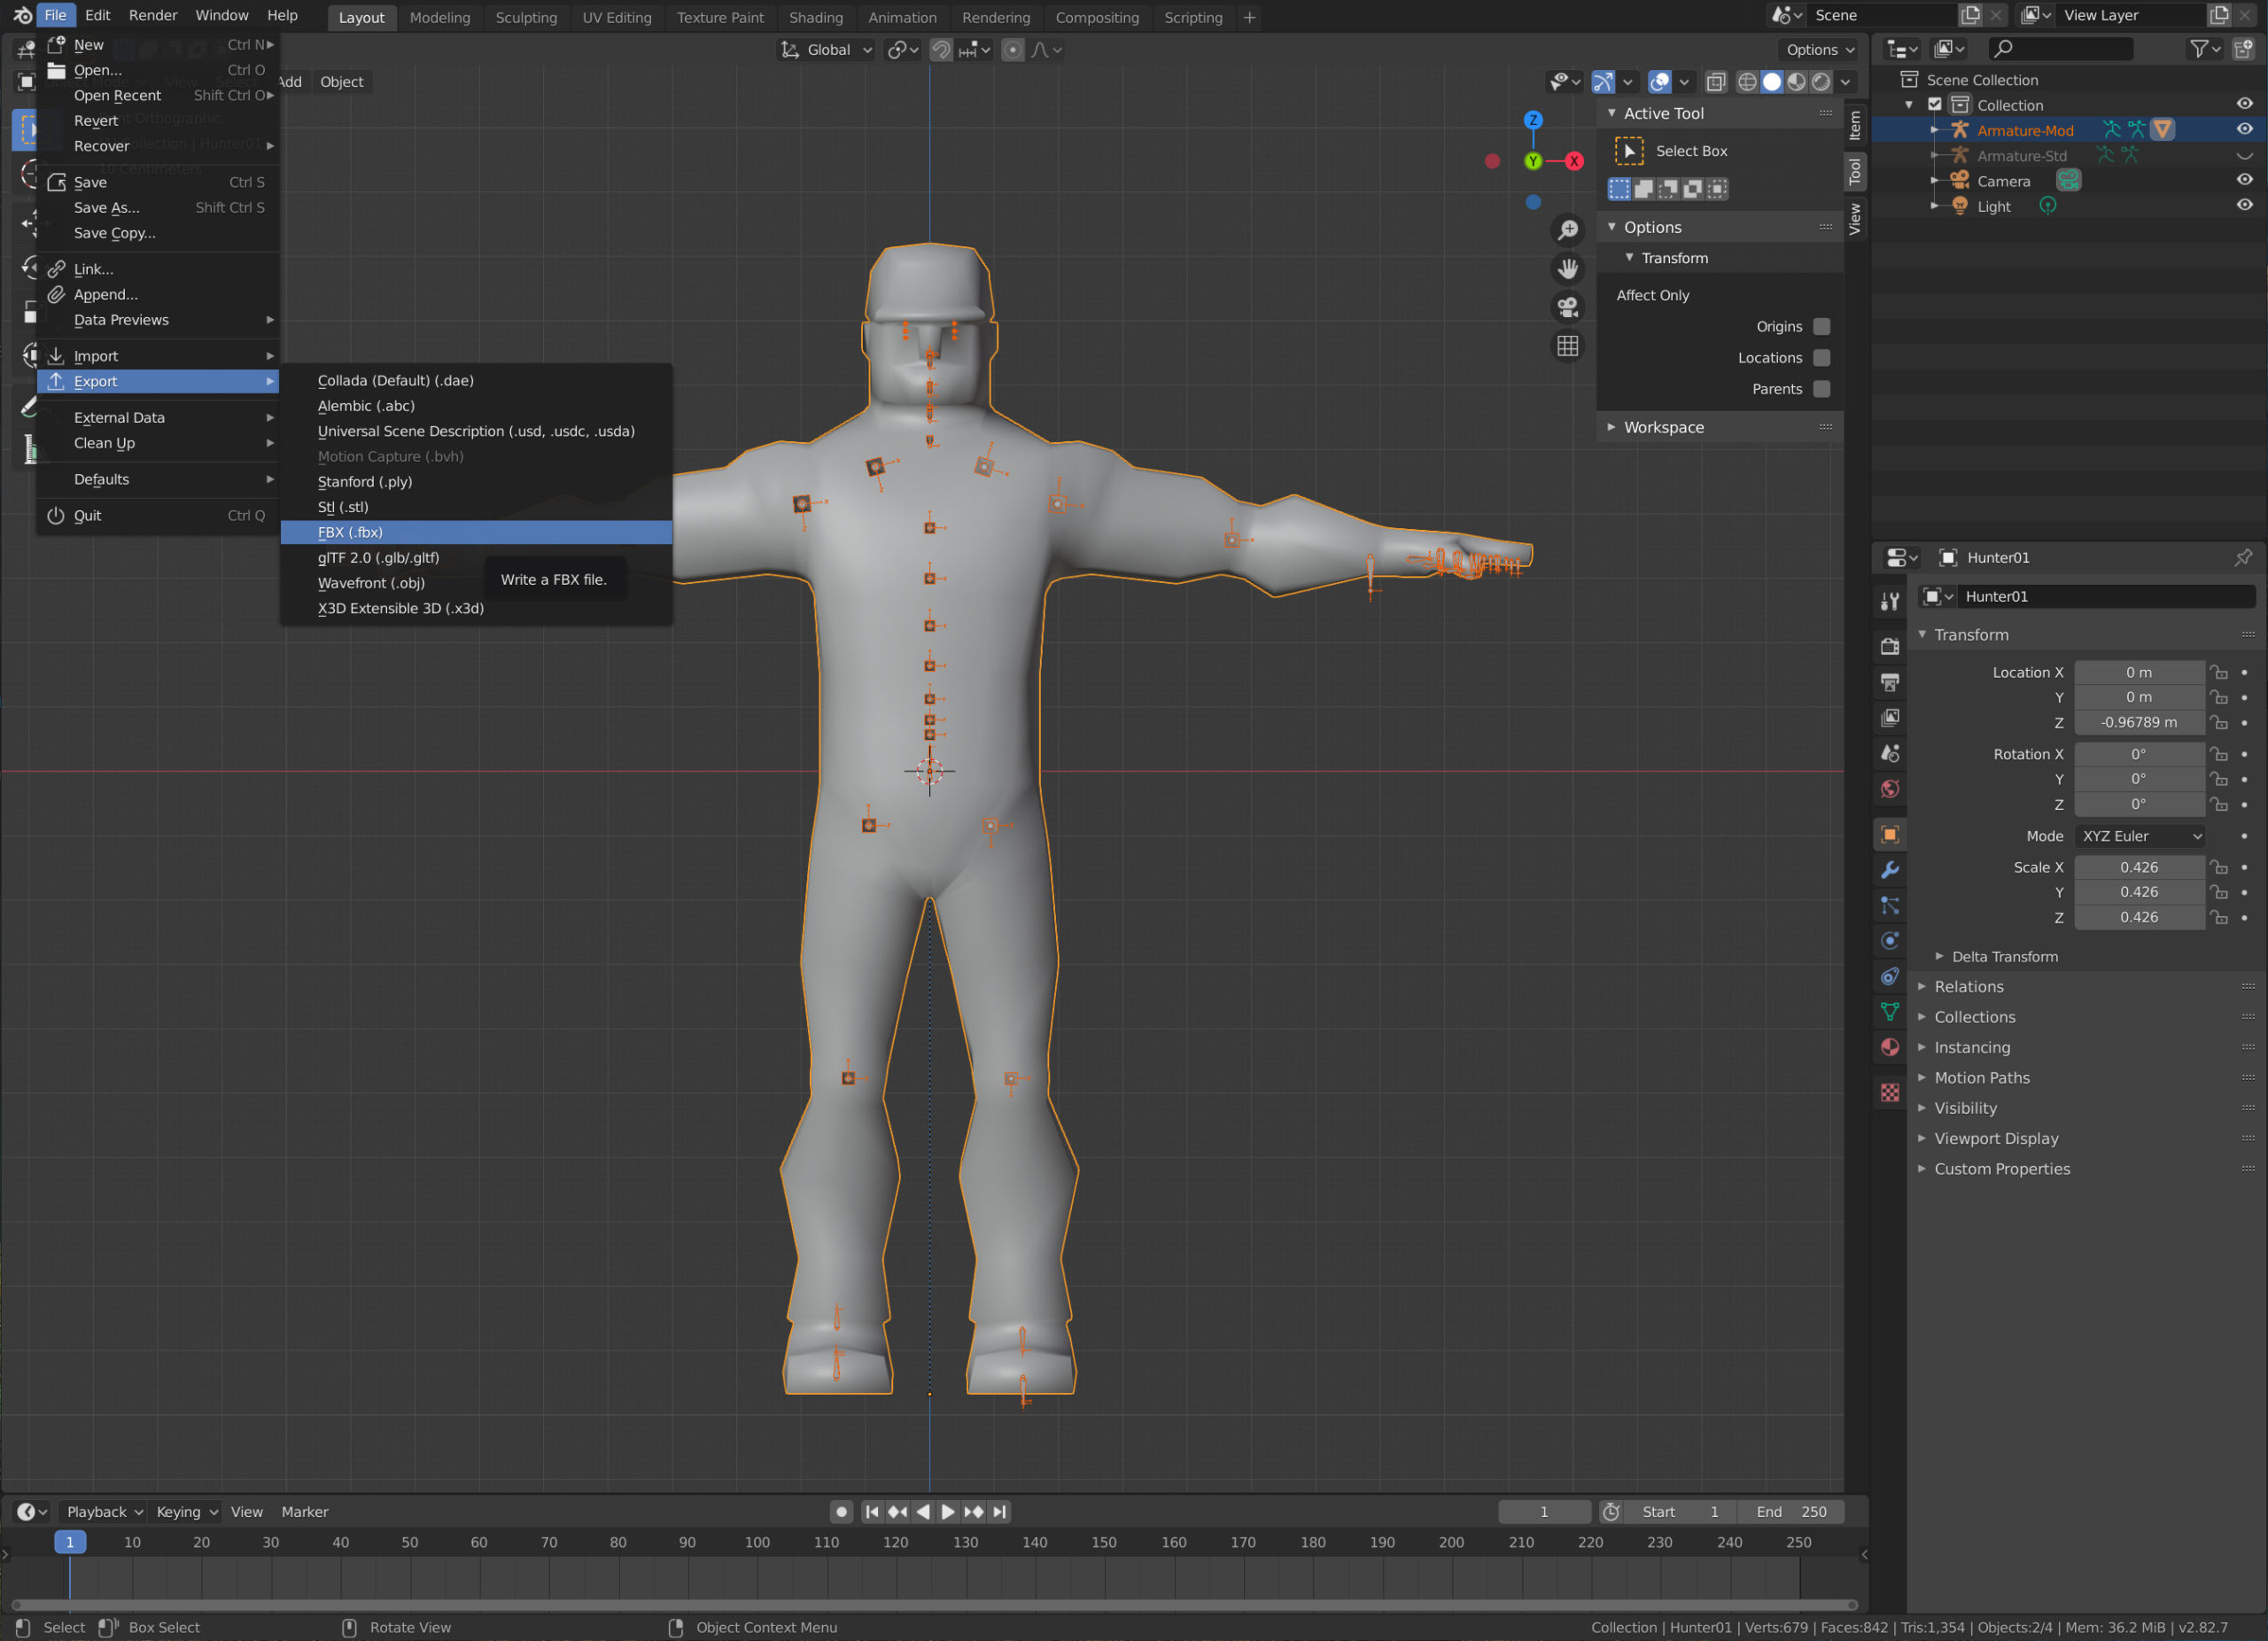
10- Export your 3D model in fbx format
We are almost done, it is time to export the model.
In "Object Mode" just select the model and the joint based skeleton (we can forget the other skeleton) and go to "Export -> FBX".
In this window check the options as the image below. (Pay special attention to scale factor)
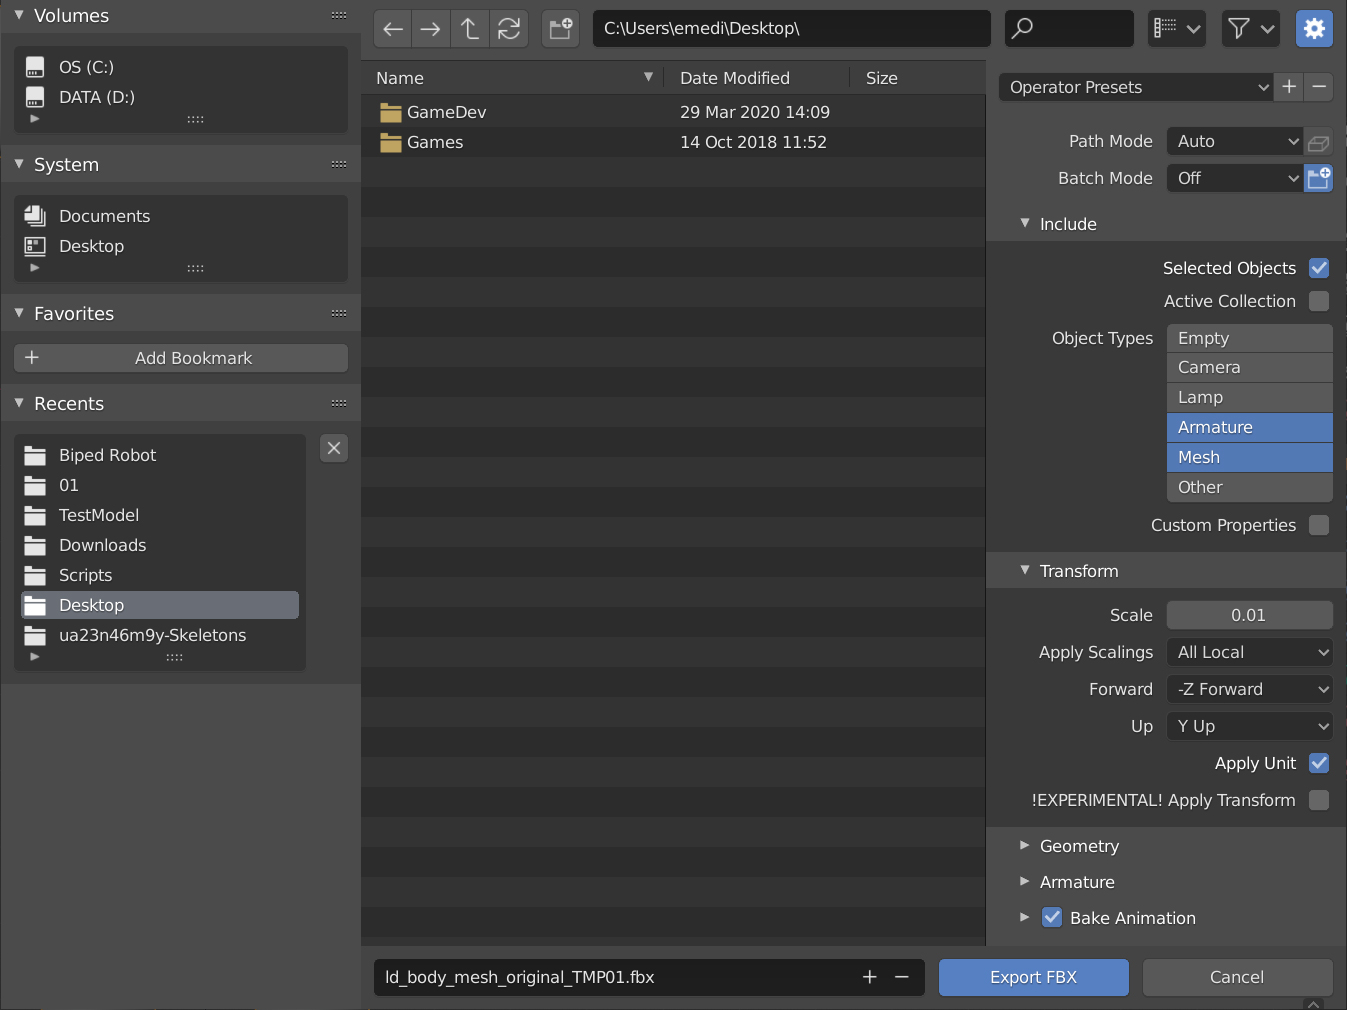
Congratulations! You have your model ready for body tracking.
11- Open your 3D model using Artist 3D Viewer and have some fun watching your model following your movements
You already have the model in .fbx tutorial ready to be loaded in Artist 3D Viewer.
Because Artist 3D Viewer is fully integrated with Files app, you can send the file to your mobile device in the usual way you do it. For us the easiest way is using a cloud service like Google Drive.
We are done! Have some fun leting the model follow your movements.
We hope this tutorial had been helpful. If you have any question feel free to contact us, yor comments are importan in order to improve Artist 3D Viewer.